
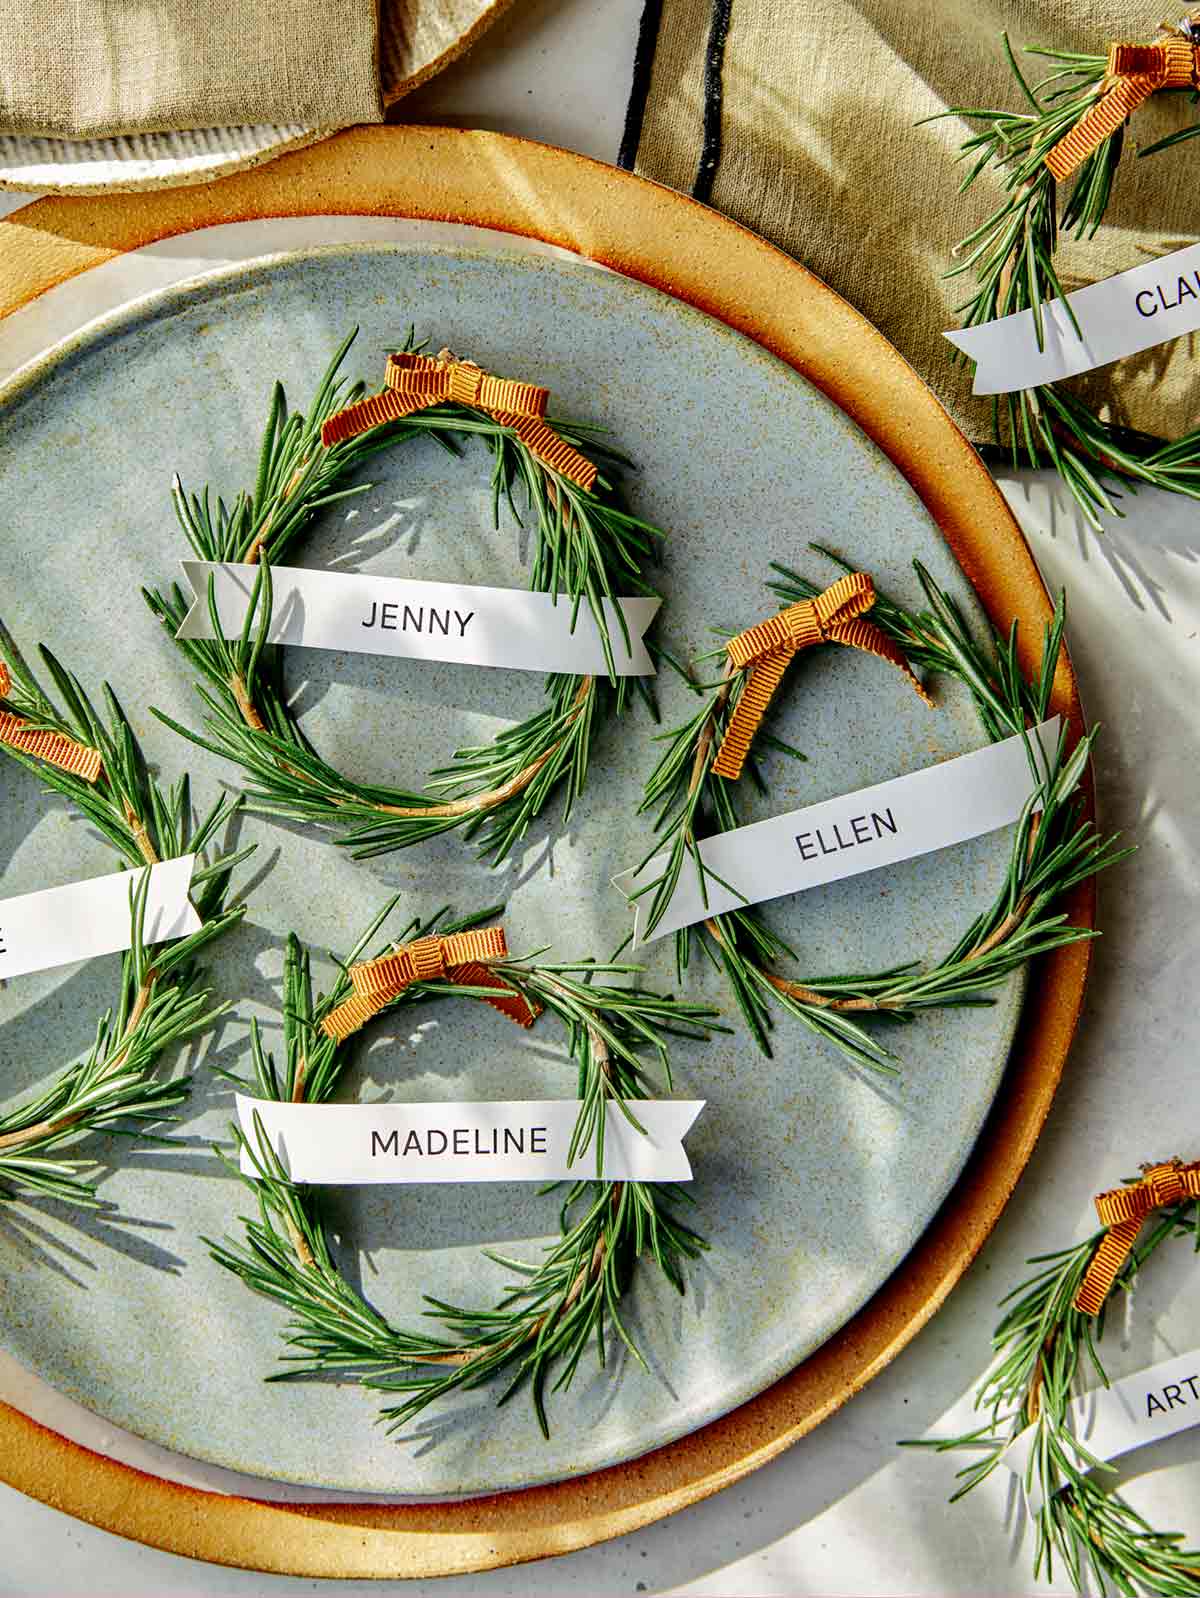
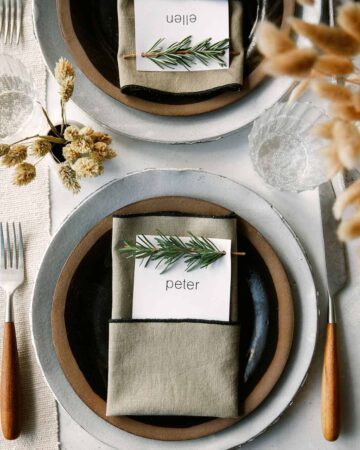
At the farmers market I go to this one booth has these crazy long stems of rosemary. They are so huge and fragrant. I am always trying to think of a creative non food way of using them. This idea of using them for place cards just popped into my head and seemed like a winner. So, I went with it, and now we have this cute little Rosemary Wreath Place Cards DIY for you! Perfect for Thanksgiving, obviously. This project is really simple. All you need are rosemary sprigs, floral wire, scissors, and twine or ribbon. This DIY also takes very little skill, so don’t worry if you are terrible at crafting!
Let’s get started below!
How to make Rosemary Wreath Place Cards
Supplies
I love this DIY because the supplies requires are pretty easy to get!
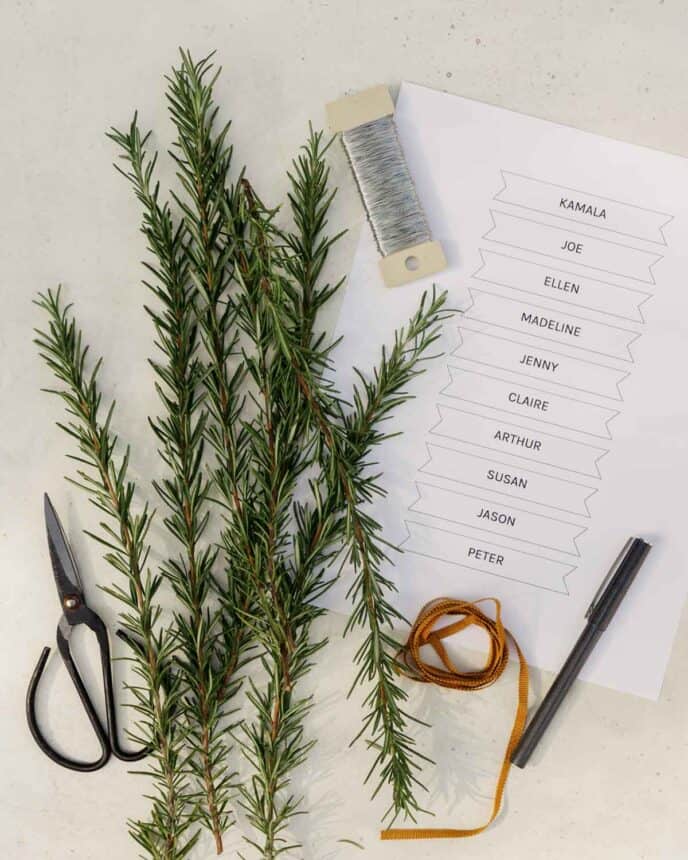
- Rosemary sprigs – check out below in the tips and tricks section of this site for more info and how to choose the best sprigs
- Scissors
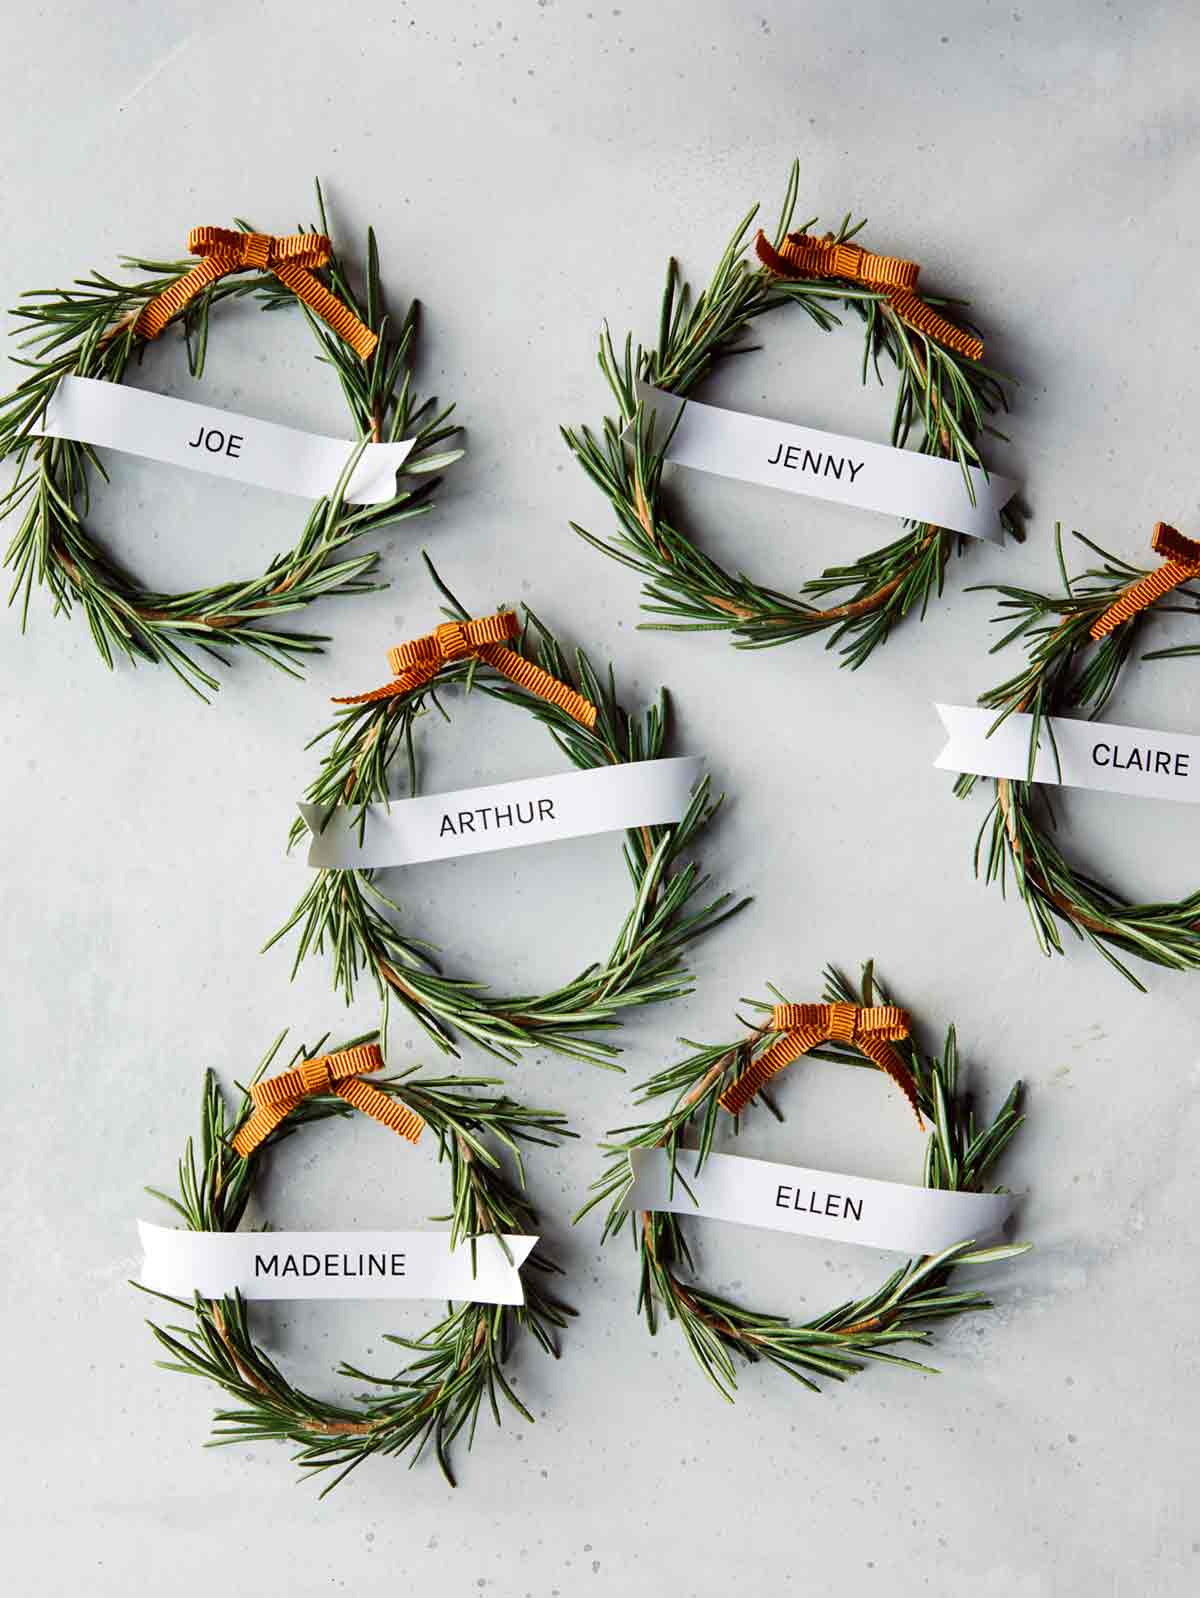
- Name Tags – Each name tag should be about 3.75″ x .5″. This is a good size for the circumference of the wreaths you end up. You can print this template I made and write in the names by hand, or type them in.
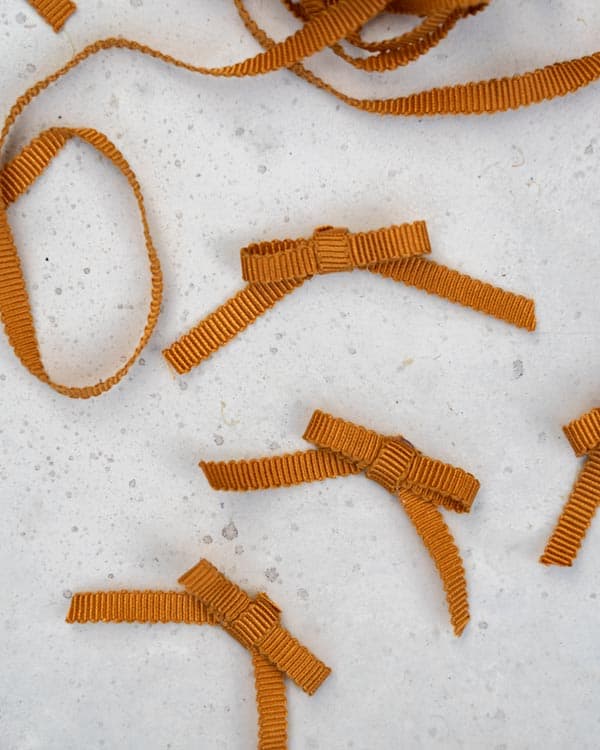
- Ribbon or Twine – the ribbon you see in the image that I used is by Peter Sham and it’s absolutely beautiful. I am using the quarter inch width. You can use whatever you prefer.
- Floral Wire
- A pen or pencil – must be smooth and not have ridges on the outside.
Process
- Print out the name tag template – or make your own. Cut out each name tag.
- Using a smooth sided pencil or pen, curl the edges of the name tag strips in opposite directions. Set aside.
- Cut floral wire into 6 short length, approximately 3 inches each.
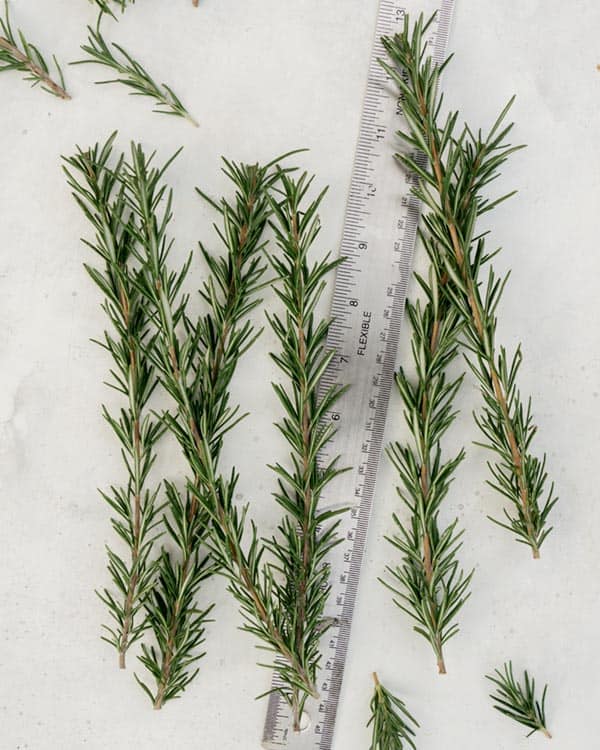
- Prepare the rosemary sprigs. First trim each sprig to be between 7 and 9 inches in length. Trim the top of the sprig off first to remove the weak top and get to the thicker stem part of the sprig. Then trim the bottom to get the total length to be between 7 and 9 inches.
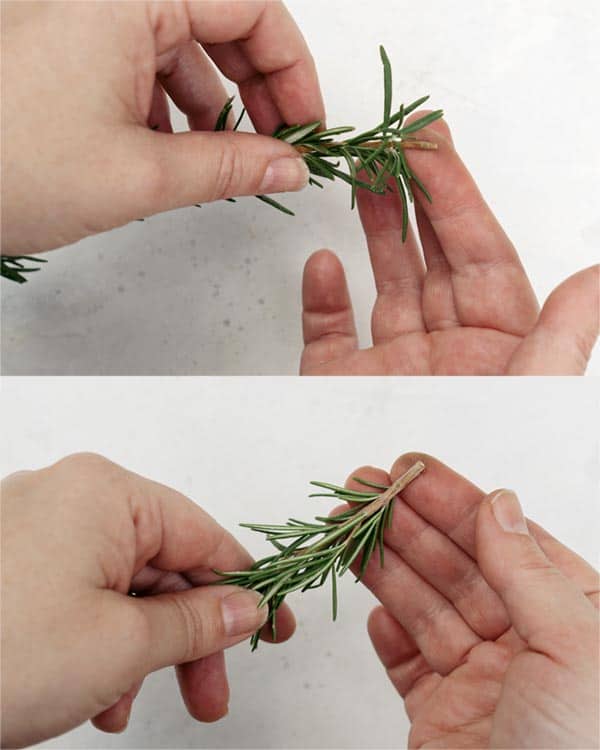
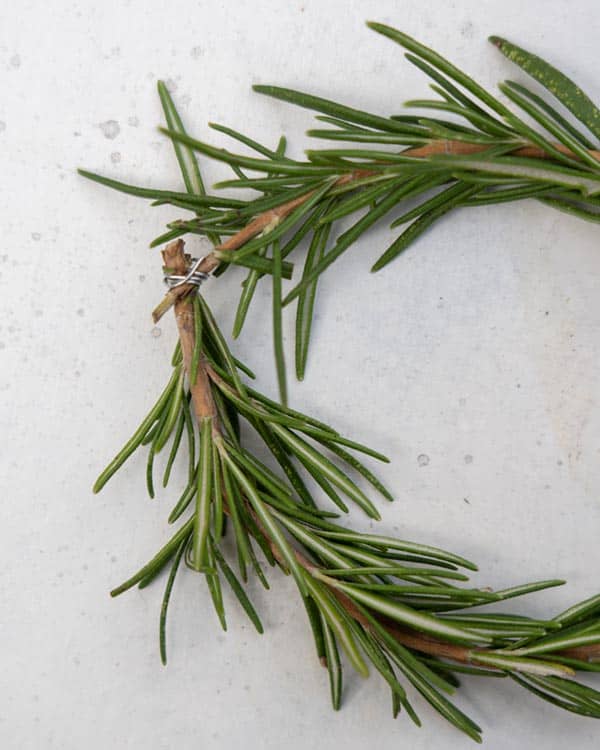
- Remove rosemary leaves at the top and bottom of each sprig, revealing approximately a quarter to a half and inch of bare stem on each end.
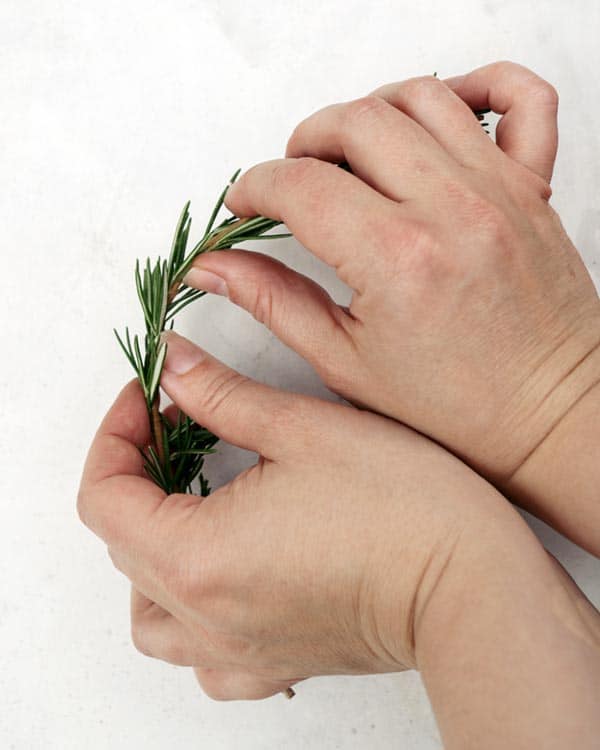
- Working from the thickest part of the stem to the thinnest, gently flex the sprig with your fingers to make it more pliable.
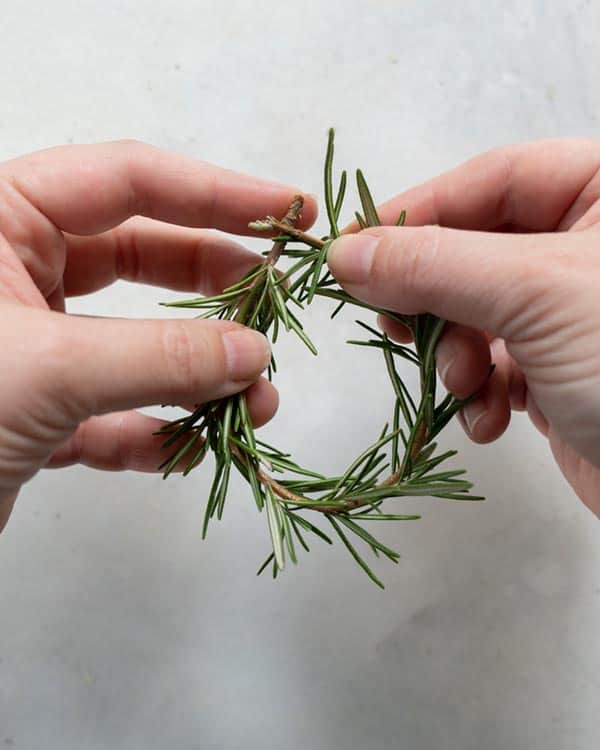
- Grab each end of the sprig and make a circle by crossing the two ends. Secure with the pre cut floral wire by winding it around the two ends together,
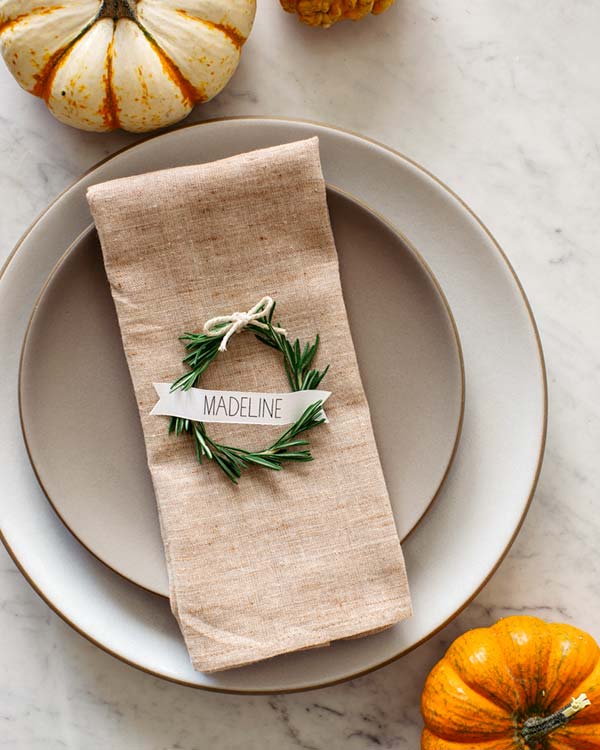
- Tie a ribbon or twine around the floral wire to cover it and make a bow. You can also hot a glue a pre-made bow to the top of the wreath as well.
- Tuck the curled name tags into the rosemary leaves, and then enjoy your rosemary wreaths.


Tips and Tricks
- If you don’t have floral wire, you can use twist ties.
- You can make these ahead! Depending on how fresh your rosemary is, these will last for about 5 days. You can store them in the refrigerator on a baking sheet in a single layer. Place a damp paper towel over the top and replace as needed.
Rosemary Sprig Tips
- It is better to try and purchase rosemary sprigs that come in a bundle and not in a plastic clamshell. That way you will be able to get the longest sprigs possible. Farmers markets are a great place to get longer rosemary sprigs. If you have a neighbor with a big plant – hit them up!
- The sprigs that work best are the ones with a single stem. If you get some other sprigs that have some sprigs coming off the main stem go ahead and just trim those off.
- My favorite way to wash rosemary is by filling the sink with about two inches of water and letting them soak for a little. You can move them around in the water and then dry them with a towel. This gets them very clean!
- When you are flexing the rosemary sprigs to make them more pliable, do this carefully and little by little. You want to avoid snapping the stem because it will make your wreath crooked.

More DIYs you will love!
- Rosemary Wreath Gift Toppers
- DIY Mini Wreath Place Cards
- Cement and Wood Place Card DIY
- DIY Place Cards

Check out of Rosemary Wreath Place Card Google Web Story.
Hungry for more?
Subscribe to never miss a recipe. Follow along on Instagram, Facebook, Twitter, and Pinterest.

Rosemary Wreath Place Cards
EQUIPMENT
- Rosemary sprigs
- Printed Name Tags (or strips of paper to hand write names)
- Scissors
- Floral Wire
- Ribbon or Twine
- Pen or pencil that is smooth sided
- Hot Glue Gun (optional)
SUPPLIES
- 6 Rosemary Sprigs
- 6 Name tag strips- 3.75" x .5" each Printed from this template – or your own.
- Scissors
- Floral Wire
- Ribbon or twine
- Pen or pencil that has smooth sides
- Hot glue gun optional
INSTRUCTIONS
- Print my name tag template. You can either hand write in the names, or add them in on the computer. Cut out each name tag. If you are making your own, cut strips of paper to be approximately 3.75" x .5".
- Using a pencil, small dowel, or a pen that has smooth sides. Curl the edges of the name tags in opposite directions.
- Cut the floral wire into 6 lengths approximately 3 inches each.
- Trim rosemary springs into lengths between 7 and 9 inches. First trim the top off, then the bottom. When you trim the top, you want to try and get down to the thicker stalk part of the sprig, that way when you wire it, it will hold much better.
- Remove rosemary leaves at the top and bottom of the sprig to reveal a half inch or a quarter in of stick. This is where you will wind the floral wire.
- Working from the thickest part of the sprig to the thinner, gently flex the sprig to make it more pliable.
- Gently make a circle by crossing the two ends of the rosemary sprig. Wind the pre cut floral wire around the ends.
- Tie a ribbon or twine, or hot glue a ribbon to the rosemary wreath to cover the floral wire.
- Tuck the name tags within the rosemary leaves. Enjoy your rosemary wreaths!


Did you make this recipe? We want to see!
tag @SpoonForkBacon and #SpoonForkBacon on Instagram
This is the cutest! Where did you get your plates? I’m in love????
Hi! So glad you like them. They are from Heath Ceramics. I love them! Heavy, beautiful and dishwasher safe and all that jazz. :)
Love it! Will def try this for X-Mas!
LOVE, LOVE this Idea!! My son’s girlfriend’s parents are joining us for Thanksgiving next week. These rings will smell and look wonderful with some red grapes at each place setting. Many thanks for sharing such a simple idea with everyone!
These mini wreaths are adorable! Thanks for sharing!
hi there! Absolutely adore this idea! I was wondering if you mind if I use your photo and instructions for my gardening Facebook page… I am making a post about how to use things from the garden even in the winter with recipes and decor and just fell in LOVE with these… I would of course give you the credit and full link to your blog… Wanted to ask for permission :-) Merry Christmas
We don’t give permission to use our recipes or instructions. Thank you.
Love everything about this fun DIY craft! But that aside, I also love the font you used for this post’s headline and photo captions. Can you please tell me the name of it? (Seems a little different from the Hannah font you used for the place cards, but I may be wrong.) Many thanks!
Yes! It is different. The font on the image is called “Hello I like You” I purchased it here: https://www.myfonts.com/fonts/cultivated-mind/hello-i-like-you/
Las voy a hacer ahora mismo :)
Que bonitaas!
I love these napkins, where did you get these??
I got them at Heath Ceramics.
Great simple decoration. This I like :) Perfect for the upcoming summer
Love that idea – perfect for Thanksgiving!
Such a great idea – so simple, yet perfect for Thanksgiving!
So simple but so darling!
Mandy
Small Fine Print
I could not get it to let me type in names. I am working on a mac. Is that why? Thanks.
No. You would have to drop the file into a word processing program like word to be able to type on it.
Love the idea too! Exactly the thing I like to do for Thanksgiving. I’m wondering, could you use sprigs of sage the same way? If you are using sage in the stuffing it might tie in well if some don’t love the smell of rosemary… Thanks so much for the terrific idea!
You could, but sage isn’t as sturdy as rosemary and wilts quickly.
I think this is about the most adorable thing I’ve ever seen :o) I just had to pin this to my diy board! Thanks so much for sharing and I hope you’re having a great week.
croppedstories@gmail.com
Love you wreath and the helpful directions. Thanks
Definitely a great use for all the rosemary I have growing. Thanks!
These are absolutely adorable! Such a fresh idea, and so pretty on the table. Thanks a bunch for sharing!
Love this idea! Think I’m going to use it at Christmas. Thanks for sharing the tutorial!
if i want to use this for my wedding in december, how early can i start? does rosemary go bad or just stale??? :)
absolutely love this idea! thanks for sharing x
Love these little wreaths. I have two rosemary bushes in my yard, I will have do this for Thanksgiving or Christmas. What a GREAT Idea, thanks for sharing.
Donna
Lovely idea!
These are great! I’ve got a Rosemary bush in my yard, so I’m all set! Thx for sharing.
-www.thewritesteph.com