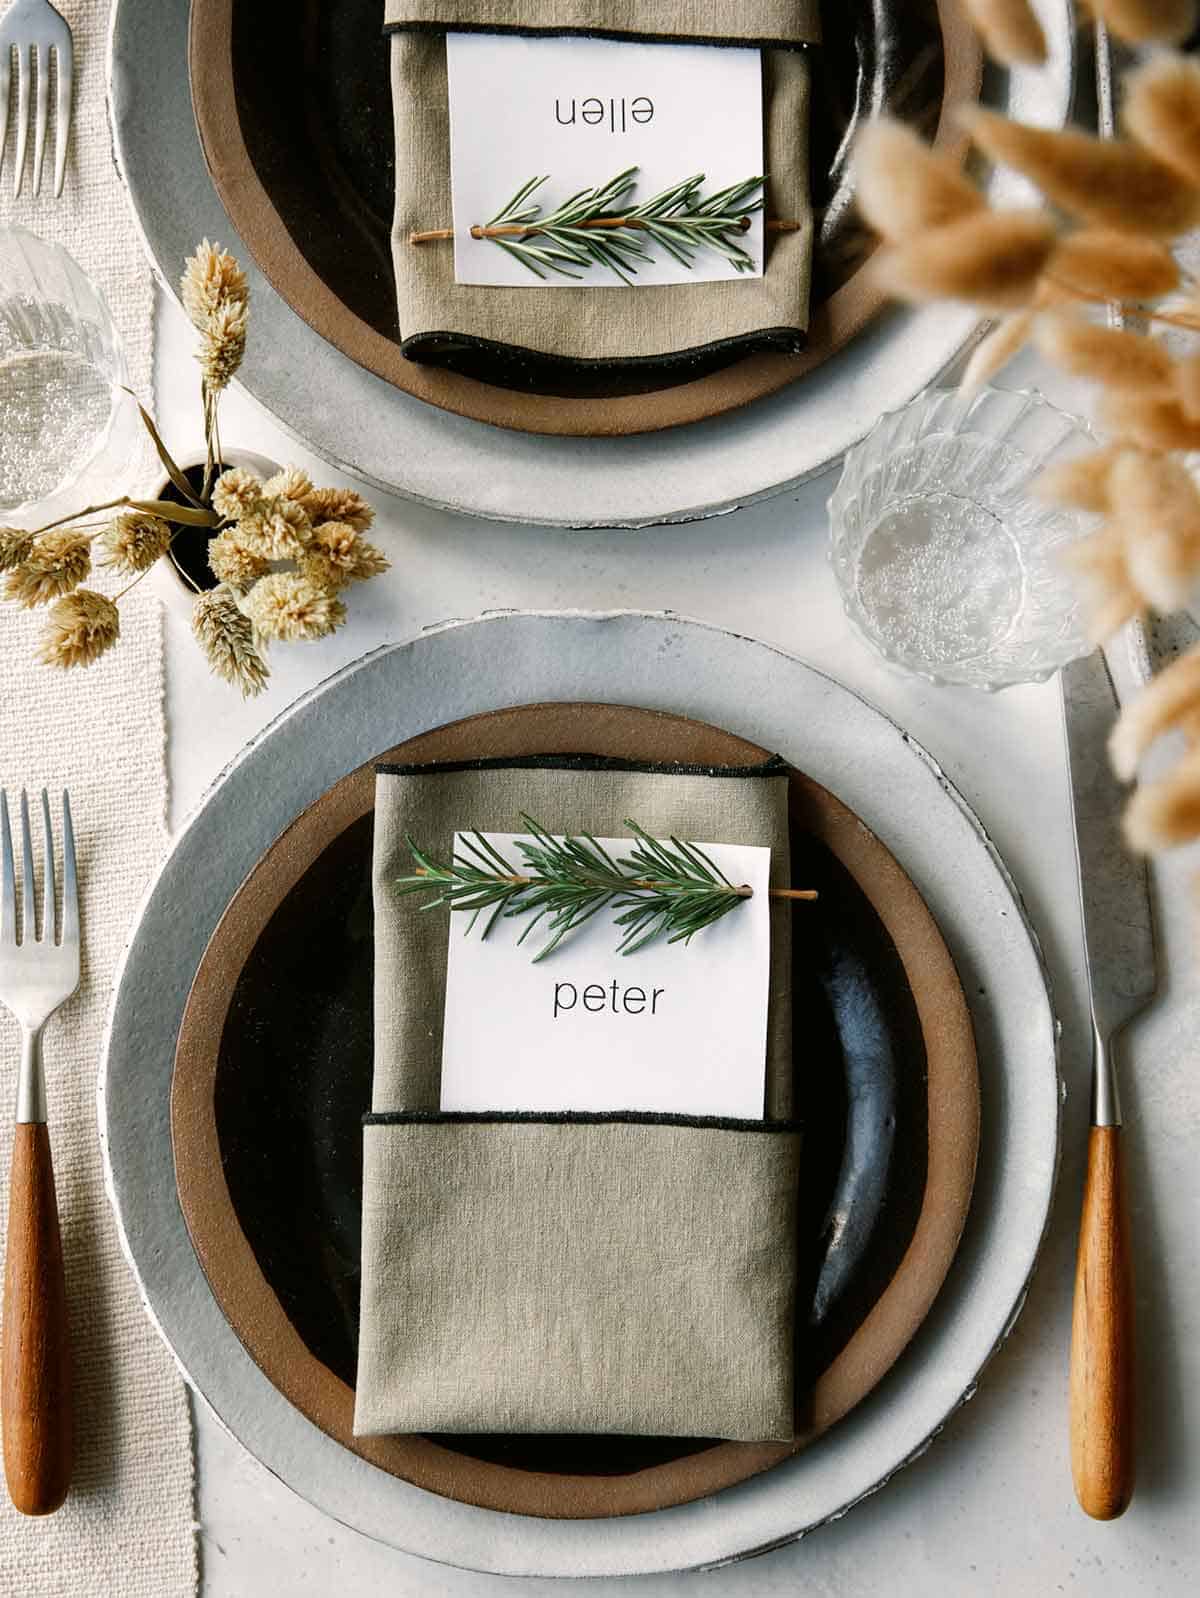
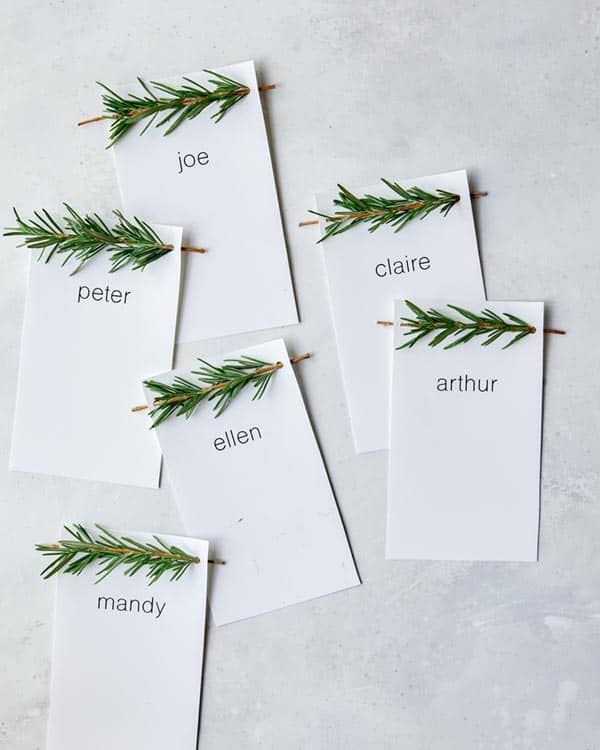
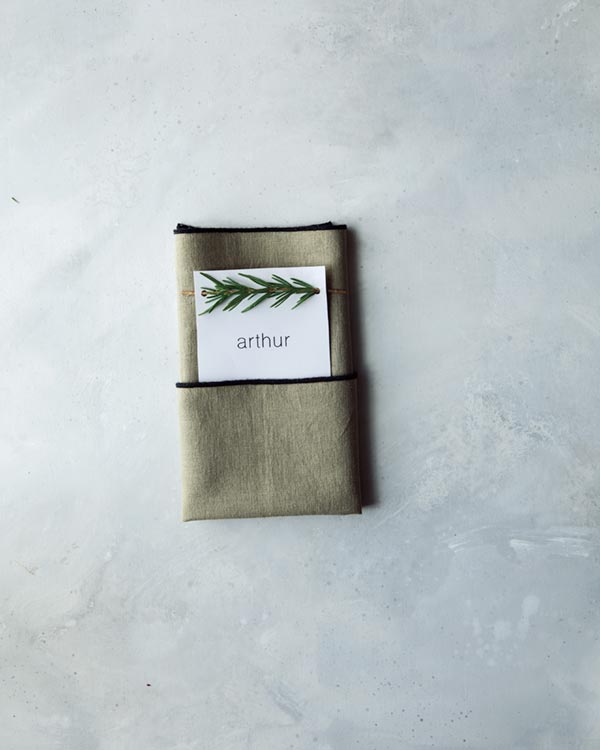
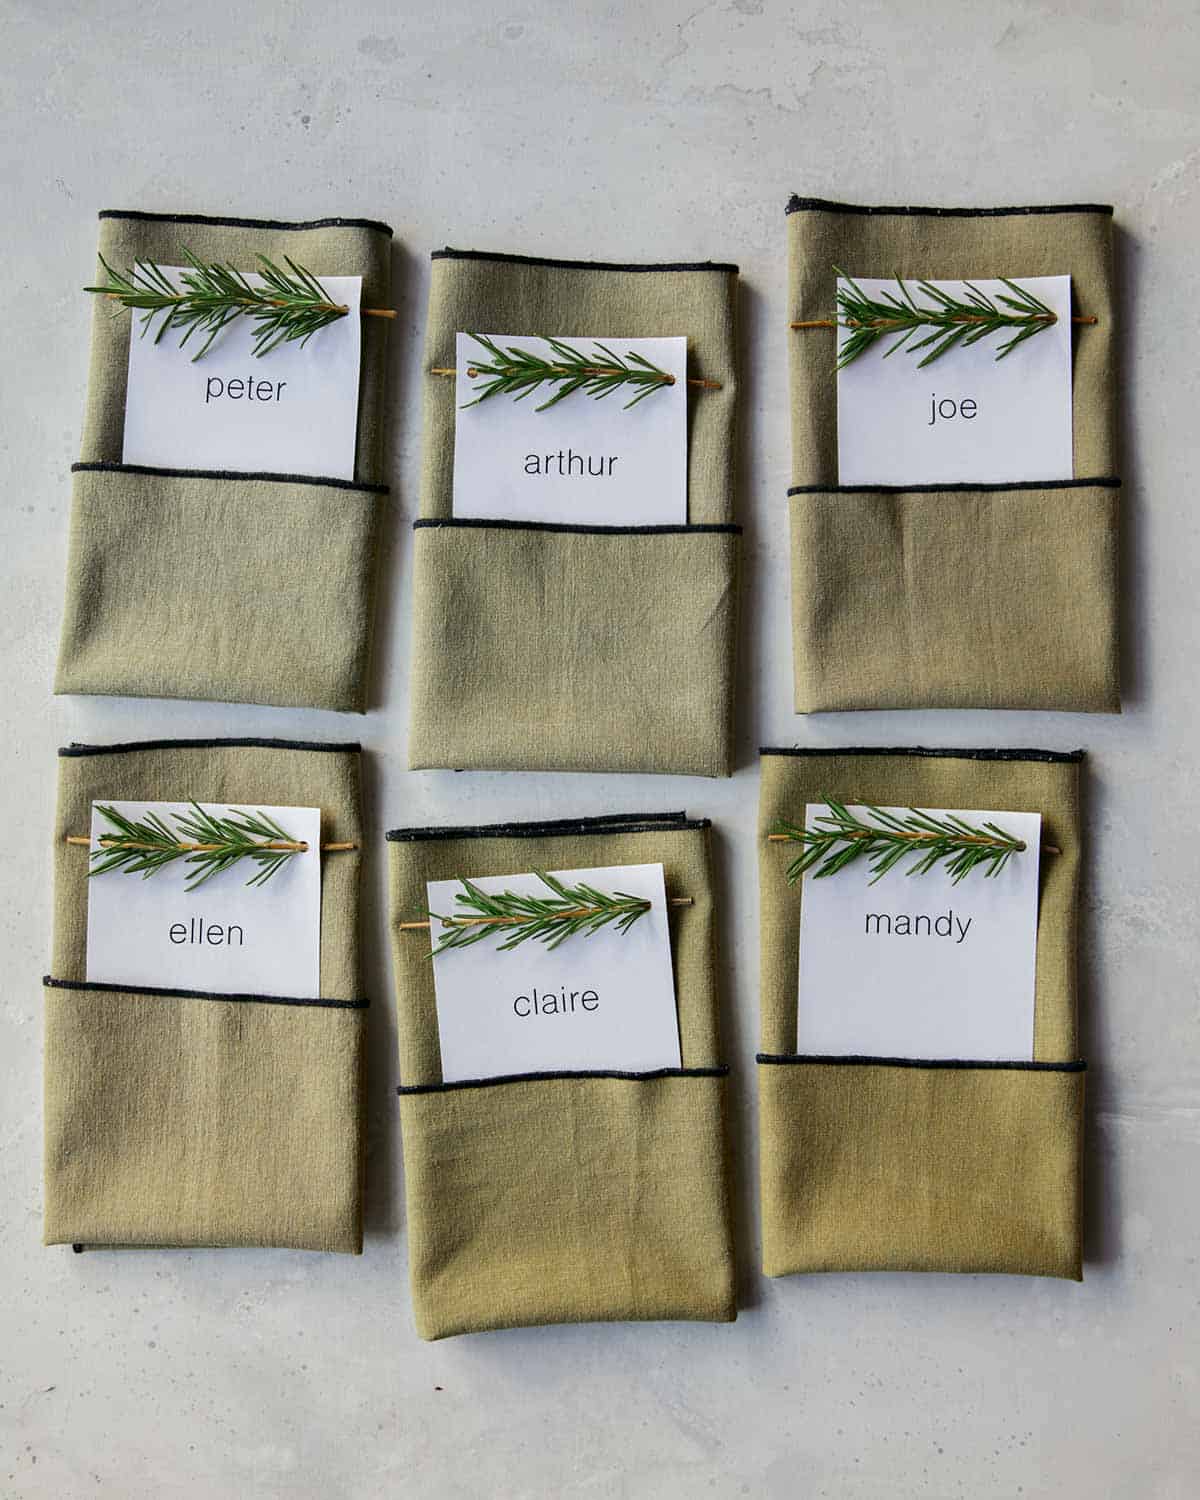
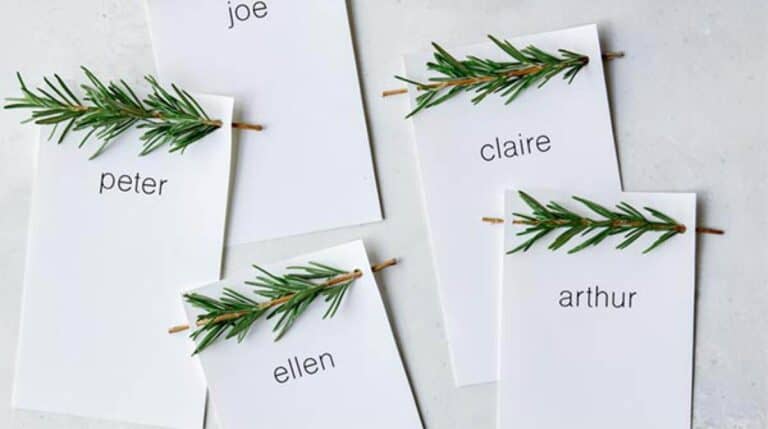
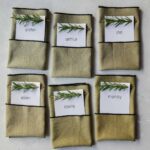
Personalized place cards are the finishing touch to any holiday table. I love thinking of new ways to make cute and easy DIYs and these Rosemary Sprig Place Cards fall into both of the categories! Cute and easy. This DIY takes only three things to make. I love that the rosemary is readily available at grocery stores making this a great last minute DIY too! So let’s get started!
How to make Rosemary Sprig Place Cards
Supplies
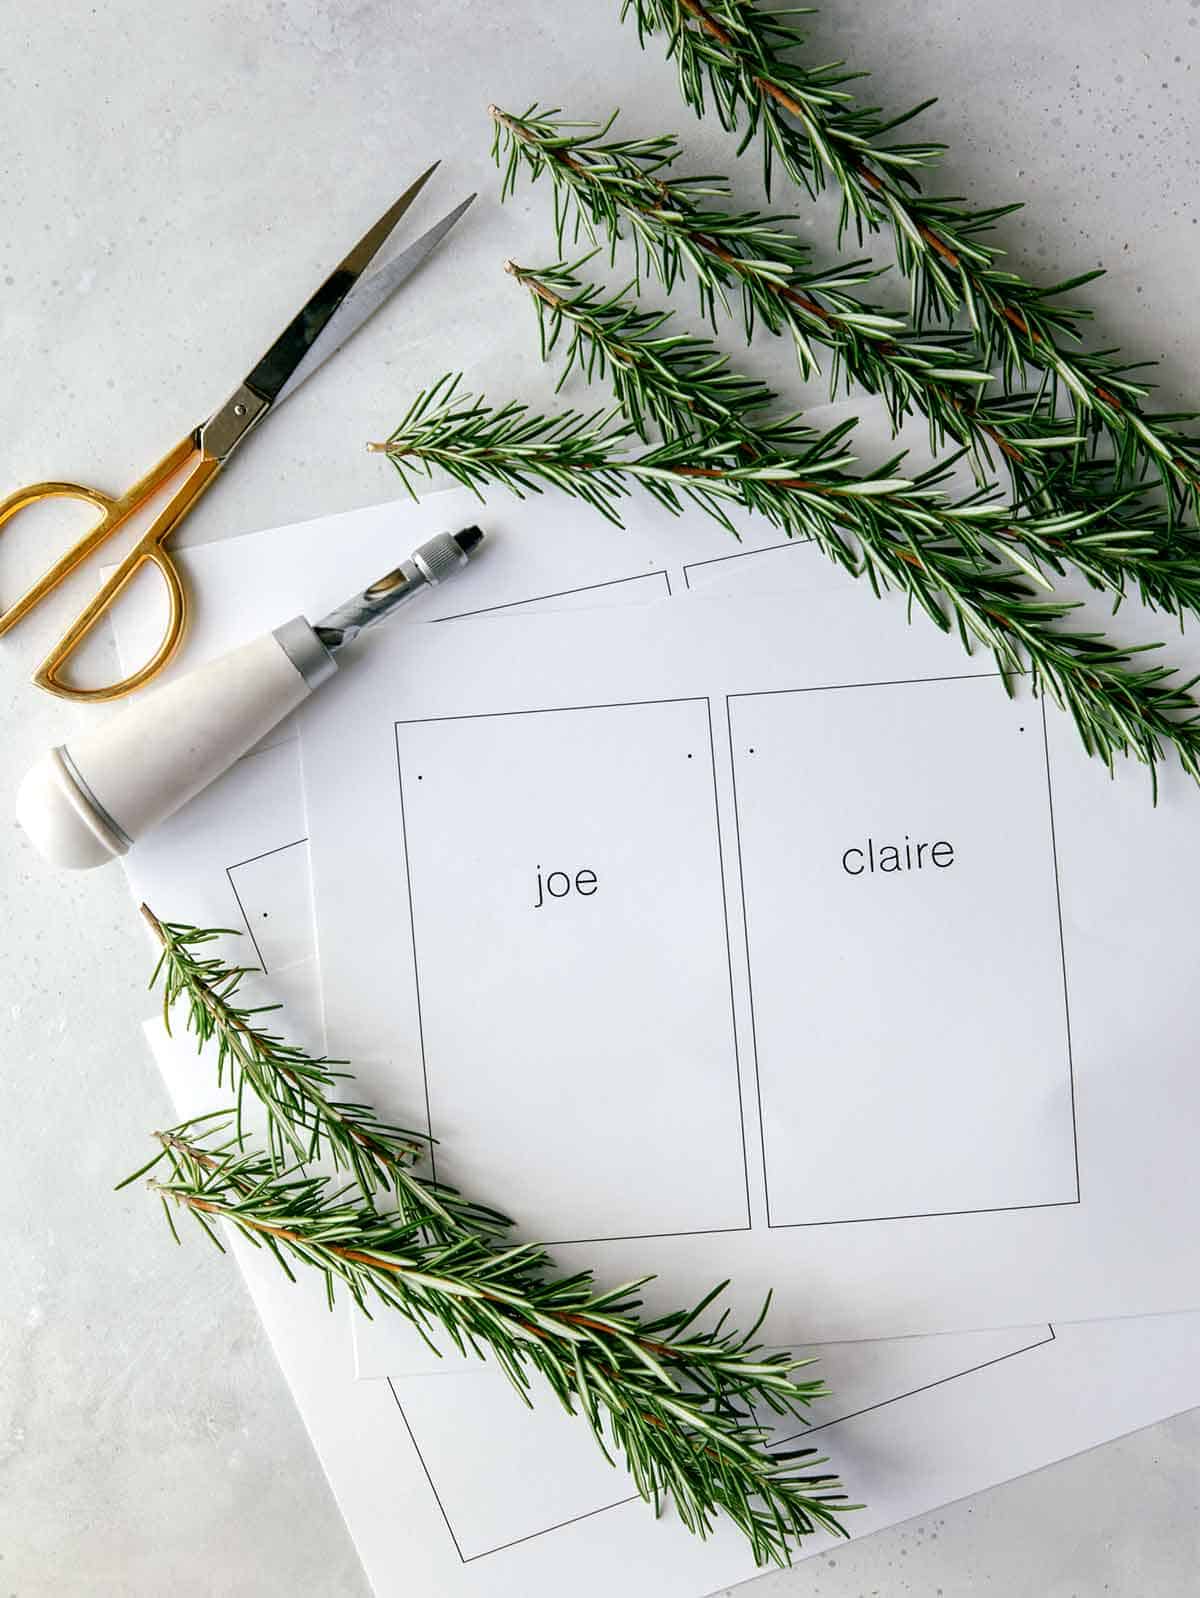
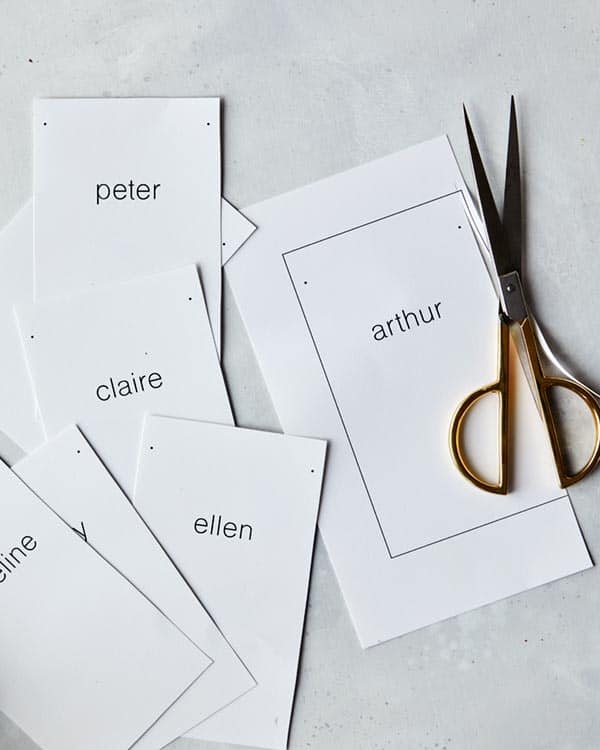
- Printed name cards – you can use this template and type each name or hand write them. You can also just cut rectangles of paper and avoid a printer all together. Each rectangle should measure approximately 3.5″ x 6″. The holes should be a half an inch from the stop, and a quarter inch from the sides. The names should be 1.75″ below the top edge of the paper.
- Rosemary Sprigs
- Hole Punch
- Scissors
Process
- Print name cards using this template. Or you can trim cards into 3.5″ x 6″ rectangles. Hand write names on them, or print names.
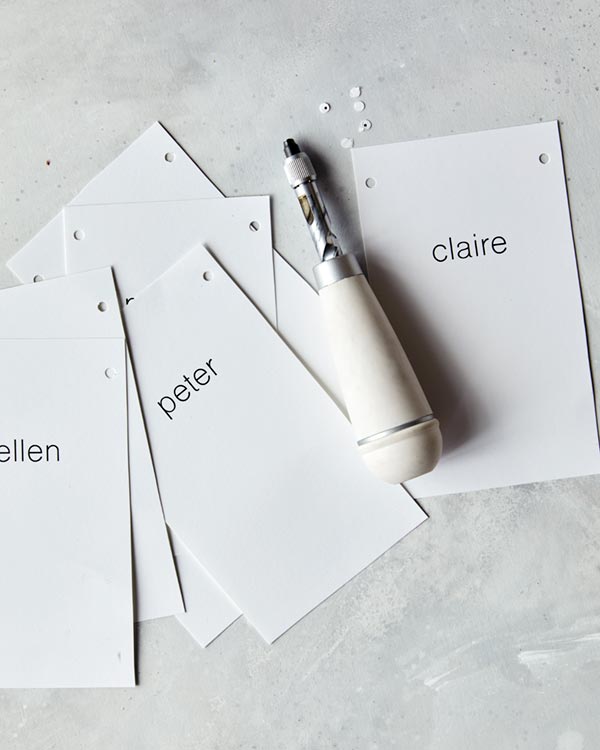
- Using a hole punch, punch holes into the rectangle. My hole punch is similar to this one, which I love.
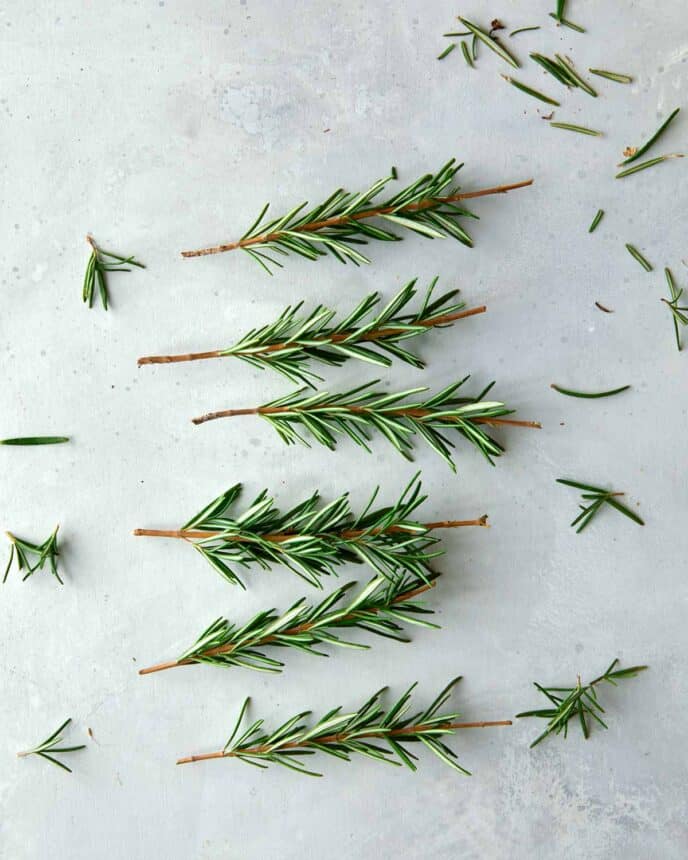
- Trim rosemary springs into 4.5″ lengths. Remove leaves leaving half an inch bare stem on either side of the sprigs.
- Carefully thread the rosemary sprigs into the holes.
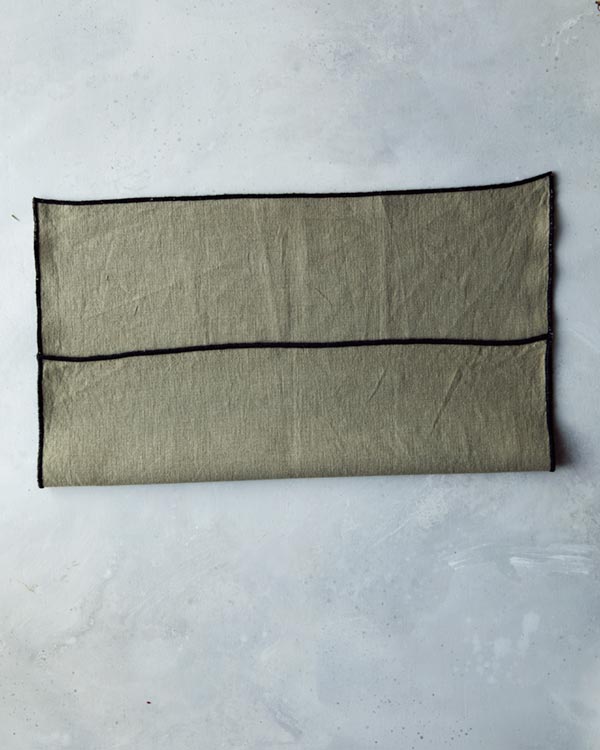
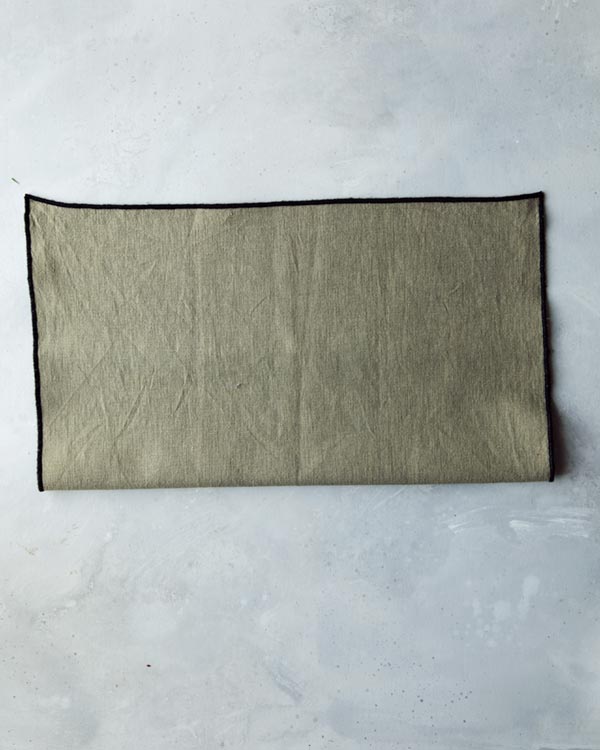
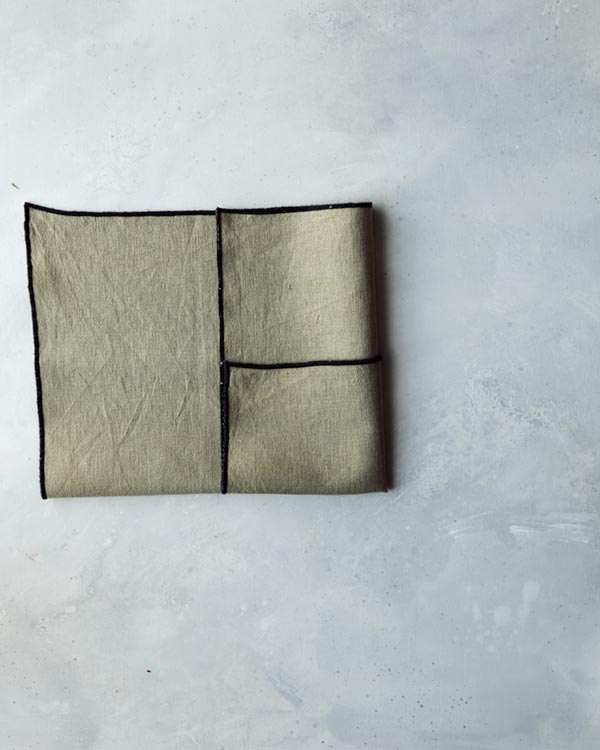
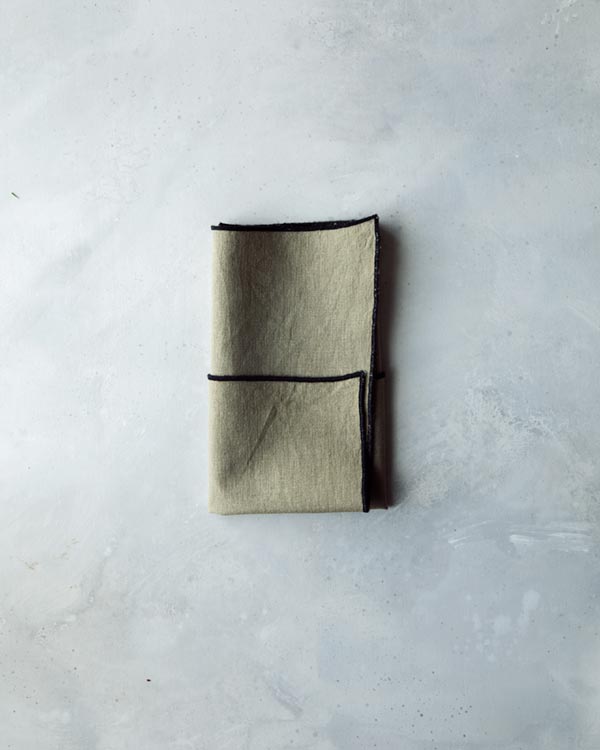
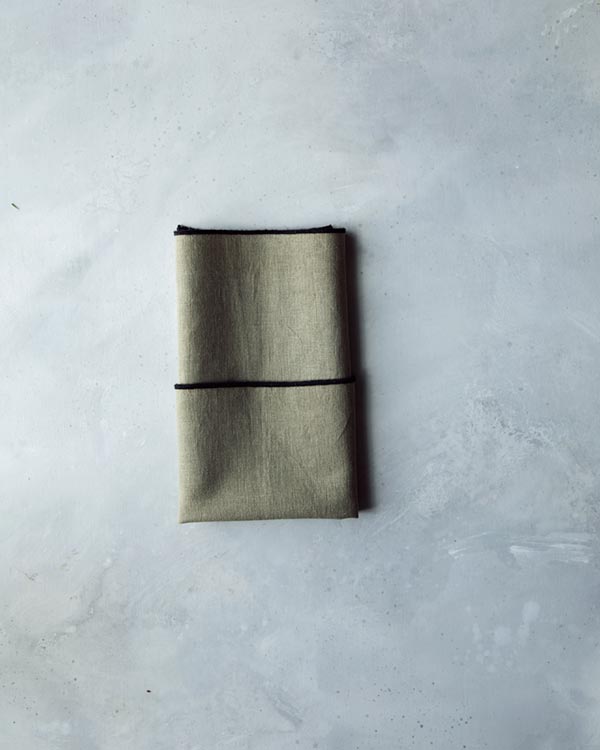
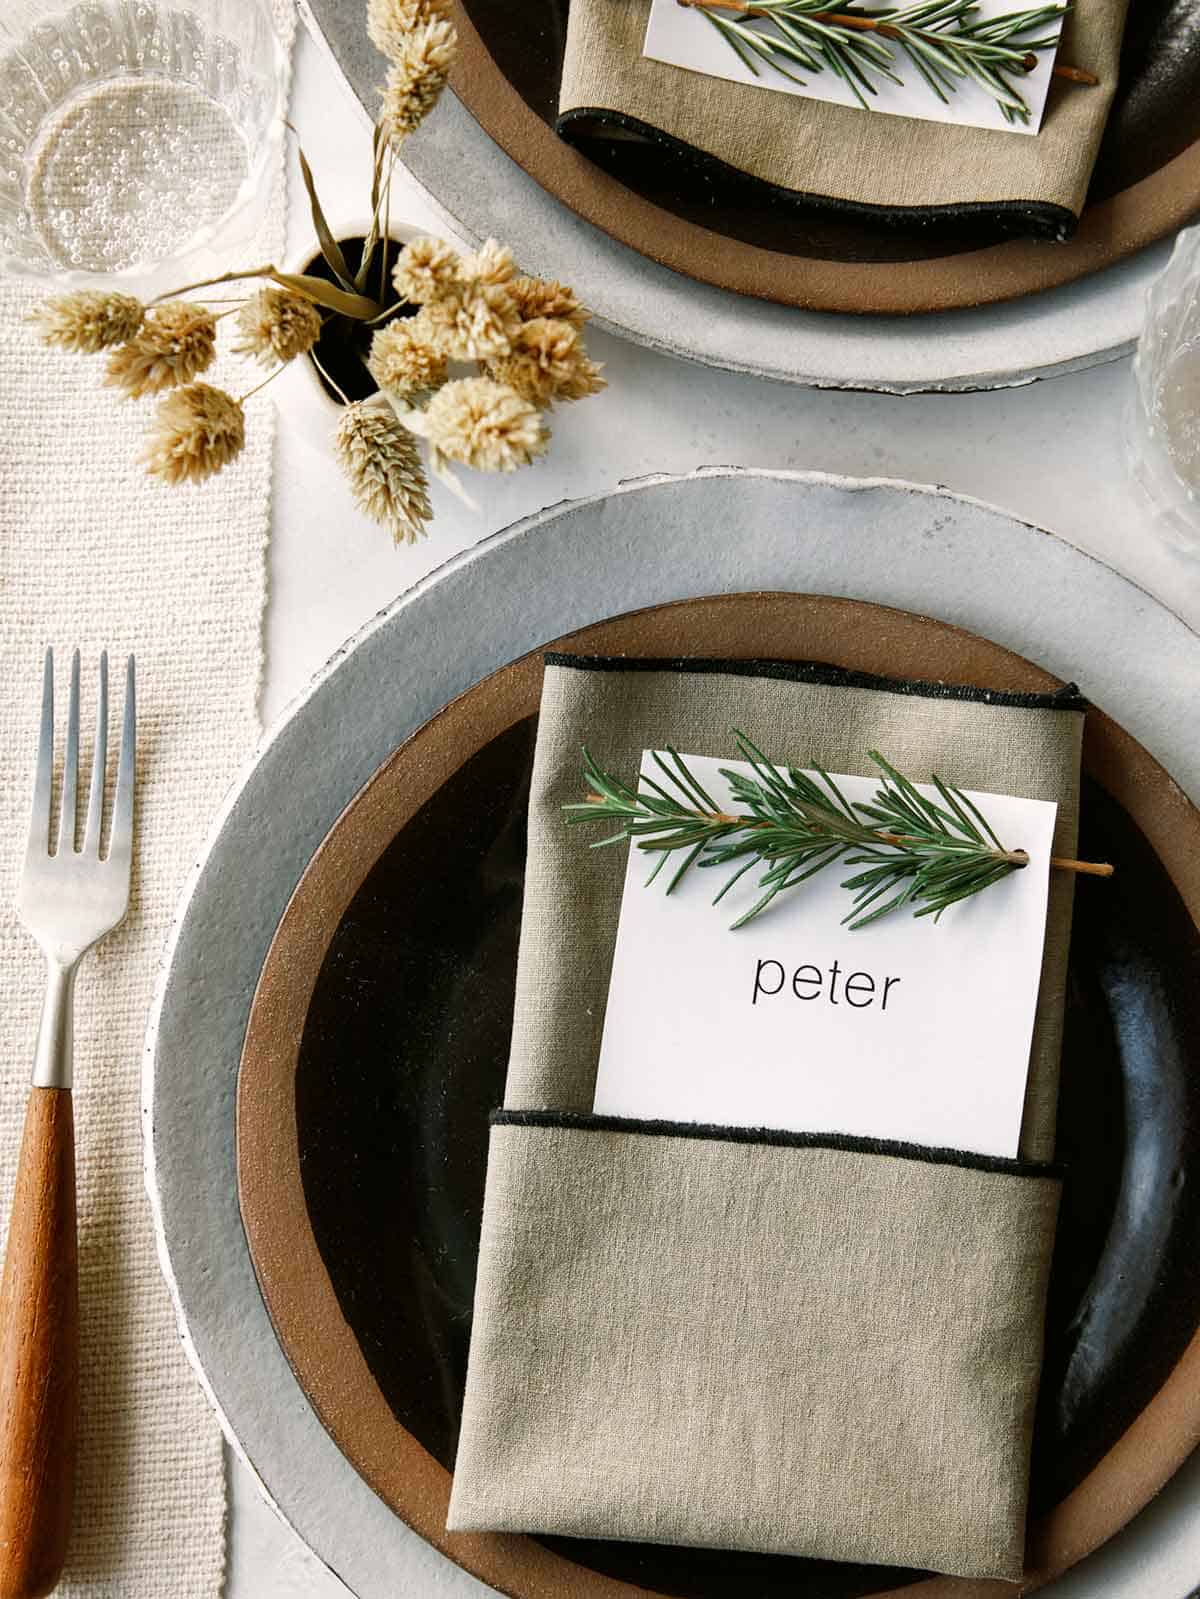
How to fold a napkin with a pocket
I love tucking these place cards into a pocket of the napkin. It’s really easy to fold a napkin to create a pocket, so I wanted to show you how I do it.

Tips and Tricks
- It’s important that you keep the holes on the paper a quarter of an inch in from the edge or more. This will help you avoid ripping the paper when you thread the rosemary stems in the holes.
- When you trim the rosemary to length, be sure to trim the top and the bottom. The ideal situation for the sprigs is to have a thicker stem at both ends. Sometimes with rosemary the top of the sprigs are wreak and floppy. That is best to cut off.
- The best rosemary for this project is the kind that is loose and doesn’t come in the plastic clam shells. I find that the ones in the plastic clam shells are often folded to fit and therefore bread. The farmers market is also a great resource – or a friends rosemary bush!
Other Holiday DIYs you might like:
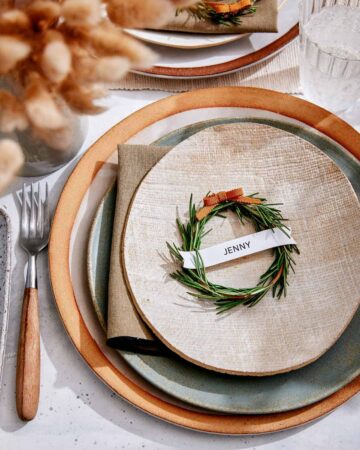
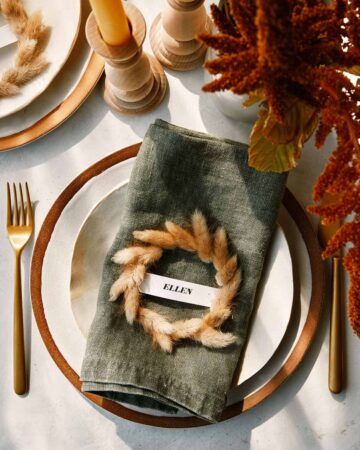
- Rosemary Wreath Place Cards
- DIY Mini Wreath Place Cards
- Cement and Wood Place Card DIY
- DIY Place Cards
Hungry for more?
Subscribe to never miss a recipe. Follow along on Instagram, Facebook, Twitter, and Pinterest.

Rosemary Sprig Place Cards
These Rosemary Sprig Place Cards are an easy DIY! They take only a handful of readily available supplies and come together super quick. Perfect if you're looking for some last minute holiday place cards!
Servings: 6 cards
EQUIPMENT
- hole punch
- Scissors
SUPPLIES
- 6 rosemary sprigs
- 6 printed name tag rectangles
INSTRUCTIONS
- Print name cards using this template. Or you can trim cards into 3.5" x 6" rectangles. Hand write names on them, or print names.

- Using a hole punch, punch holes into the rectangle.
- Trim rosemary springs into 4.5" lengths. Remove leaves leaving half and inch bare stem on either side of the sprigs.
- Carefully thread the rosemary sprigs into the holes.


NOTES
To make in advance – prepare materials. Keep the prepared rosemary sprigs in the refrigerator rolled in damp paper towels. Refresh damp paper towels as needed. Once you are ready – thread the rosemary sprigs into the holes on the rectangles.
Here is a link to the template I made for these rosemary sprig place cards.
KEYWORD: DIY, place cards


Did you make this recipe? We want to see!
tag @SpoonForkBacon and #SpoonForkBacon on Instagram
where did you ever find these awesome napkins above. love them…
I think they are from Suay Sew Shop.
Did you buy the rosemary from your local grocery store? Or did you order from somewhere?
Just at the grocery store – the bundles seem to be more stick like than the kind that comes in the plastic container.
SO Super Cute! Thank you for reposting!! Great quick and easy idea for the holiday table. Thank you!
I love it! Thanks for the idea!
Hello!
I am trying to do these for my wedding, I love them!! How did you print them? Did you use a template in Microsoft word? Thank you!
Hi! There is no template, but you could certainly make one yourself using the measurements listed in the post and downloading the font I listed as well!
The link to the template is not working I really like the font you used
Hi Elrie,
I am not sure what is not working for you on the template. The links work fine for me. You need to save the PDF in the link and then put your own font over the image to write the names. I think the font I used is Karla which is a google free font. If you google karla font it will come up as a free download. Then install it on your computer and use it to write on the PDF template included in this post.
Too perfect.Love this idea!
What size font did you use?
Love this idea! Getting married in a couple of weeks and was wondering what size hole punch (in mm) you used? Desperately trying to find one online so I can do some last minute wedding DIY!
Hi Vivian,
I used a screw punch, so I’m not totally sure what size that it. I used the martha stewart brand. Good luck!
Love this idea. We are doing a ladies event at our church and the theme is Seasoned with Grace. Too perfect. Wondering how long the rosemary will last. We decorate on Thursday for our Saturday event.
Lovely idea! Our brides would love it for fall/winter weddings! ❤️
I cannot find the HANNAH font anywhere….. am not an arts person, don’t know how to download fonts, which I tried just to see. Where is Hannah? Love it and am trying to make the darling rosemary placecards!
https://www.youworkforthem.com/font/T0235/ywft-hannah I’m sure there are more options if you google Hannah Font but this is where I purchased mine.
Hello,
The idea is delightful and I will make these cards for the Thanksgiving table.
Did you purchase sheets of printable 3.5×6″ place cards or did you cut them to size?
Thank you.
Hi Lisa,
I cut them to size, although you can find menu cards that are printable and perforated that are close to this in size I believe.
I love these simple and the rosemary smells so good.
These are lovely! I’d like to incorporate rosemary into place cards I’m doing for a bridal shower next weekend. Did you use dried or fresh rosemary? I feel like dried would be sturdier but I’m afraid they would shed easily.
We used fresh. Rosemary is pretty sturdy, and doesn’t really wilt because the leaves are so hefty. :)
would LOVE to know the FONT that you used! THANKS!
It’s called Hannah, I link to it in the rosemary wreath place cards post.
Love this idea, thanks for sharing!
I would also wondering if you could share the font you used for the place cards, its perfect.
Heidi
Hi!
I absolutely love these! I was wondering if you could tell me want font you used because I also have atrocious handwriting.
blessings,
Emma Caroline
Earthy and Elegant. I love it! Thanks for the idea!
Very pretty. Now where did you get the gorgeous cutlery in the top photo?
I got it a store thats now closed. The company that makes the flatware is called Roost and you can find the set here: http://www.highcamphome.com/wood-brass-flatware/
I am
Making these for my son’s rehearsal dinner. Do you have a way to recommend removing the rosemary from the end of the sprig on the end of the stem? ( the other end is easier to remove because it can easily be pulled off).
I have no trick for this unfortunately. My recommendation is to use thicker stocks of rosemary because it makes pulling them off quickly easier.
These are totally cute and within my skill level!!! Love, love, love! Thanks for sharing!
Oh, Iove these as much as the other place cards!! Now I’m faced with the big decision as to which one to use!! What to do…what to do… :-)
I love the idea!!!! So easy!!
xx,
E.
http://www.theslowpace.com