• Skip to primary navigation
  • Skip to main content
  • Skip to primary sidebar
  • Skip to footer
Spoon Fork BaconSpoon Fork Bacon
  • Navigation Menu: Social Icons

    • Facebook
    • Instagram
    • Pinterest
    • YouTube
    • Twitter
    • TikTok
  • What’s for Dinner?
  • Recipes By Category
  • Most Recent
  • Contact
  • Shop
menu icon
go to homepage
subscribe
search icon
Homepage link
  • Recipes By Category
  • Most Recent
  • What’s for Dinner?
  • Shop
  • Contact
    • Facebook
    • Instagram
    • Pinterest
    • YouTube
    • Twitter
    • TikTok
  • ×
    Home > Blog > DIY > Rosemary Wreath Place Cards

    Rosemary Wreath Place Cards

    by Teri Lyn Fisher · Published: Nov 12, 2020 · Modified: Nov 28, 2020

    Jump to Instructions Print Instructions Jump to Video
    A really simple DIY to make Rosemary Wreath Place Cards. These go perfect with any thanksgiving or holiday table! This DIY needs only a handful of supplies to make.
    Rosemary Wreath Place Card on a plate in a table setting.

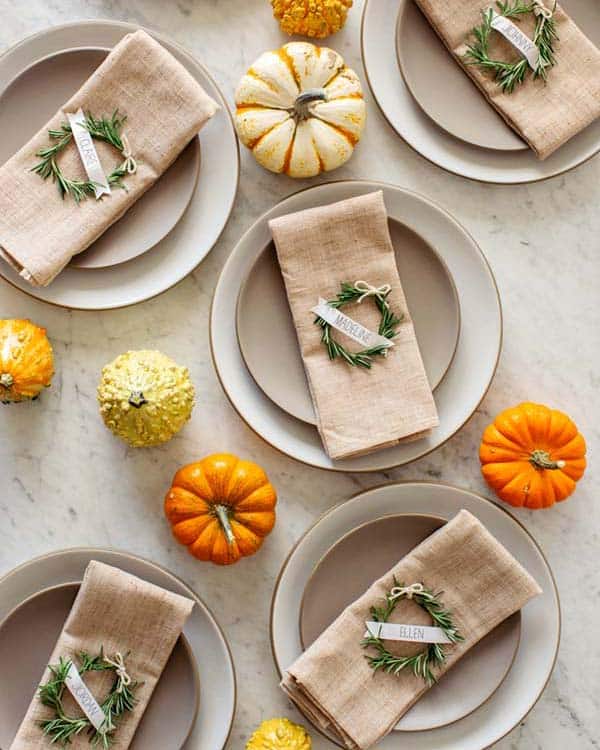
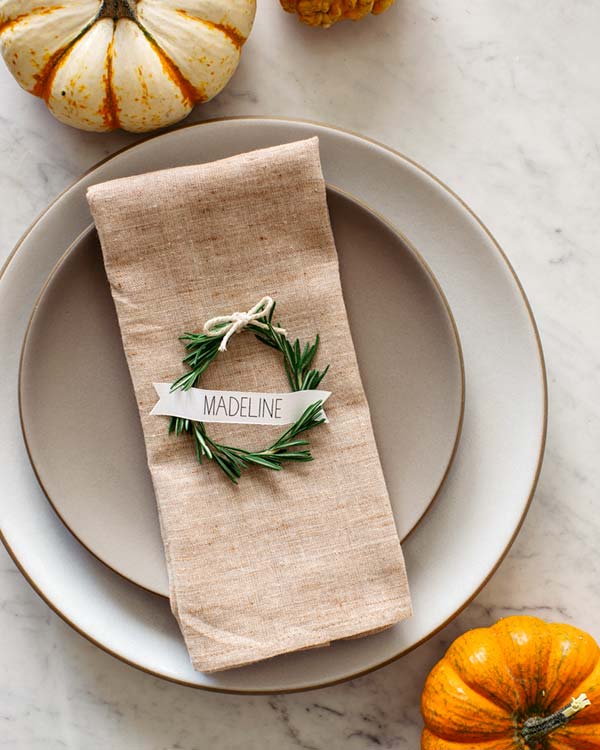
    At the farmers market I go to this one booth has these crazy long stems of rosemary. They are so huge and fragrant. I am always trying to think of a creative non food way of using them. This idea of using them for place cards just popped into my head and seemed like a winner. So, I went with it, and now we have this cute little Rosemary Wreath Place Cards DIY for you! Perfect for Thanksgiving, obviously. This project is really simple. All you need are rosemary sprigs, floral wire, scissors, and twine or ribbon. This DIY also takes very little skill, so don’t worry if you are terrible at crafting!

    Let’s get started below!

    Six rosemary wreath place cards on a table spread out.

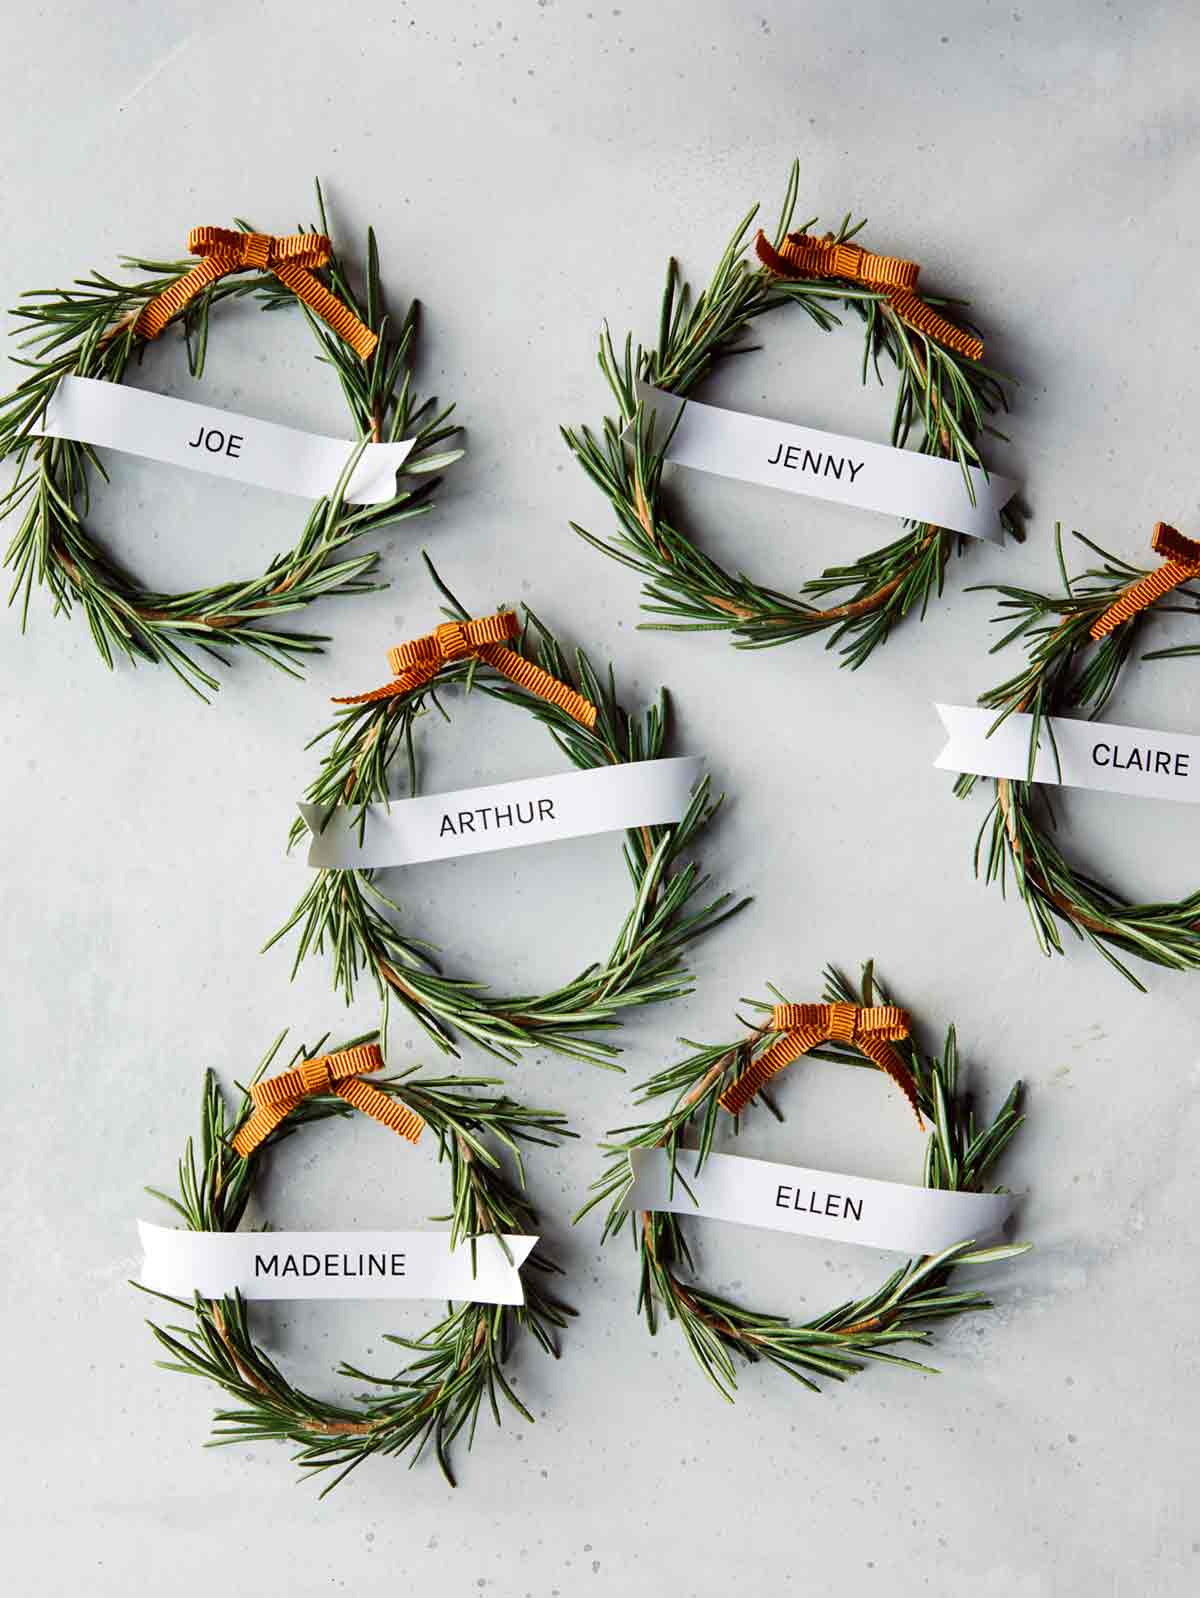
    How to make Rosemary Wreath Place Cards

    Supplies

    Supplies for rosemary wreath place cards on a surface.

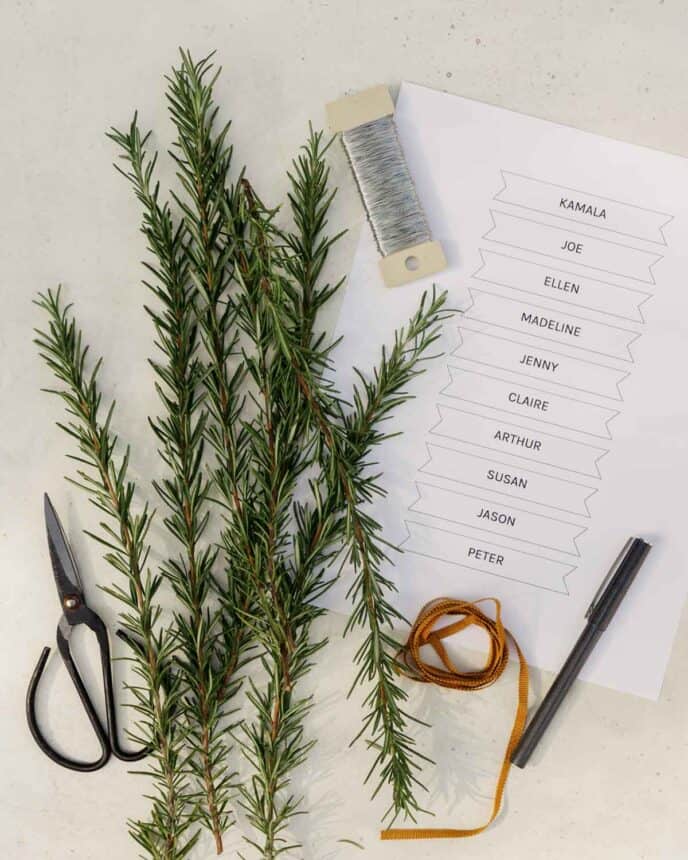
    I love this DIY because the supplies requires are pretty easy to get! 

    • Rosemary sprigs – check out below in the tips and tricks section of this site for more info and how to choose the best sprigs 
    • Scissors 
    • Name Tags – Each name tag should be about 3.75″ x .5″. This is a good size for the circumference of the wreaths you end up. You can print this template I made and write in the names by hand, or type them in.
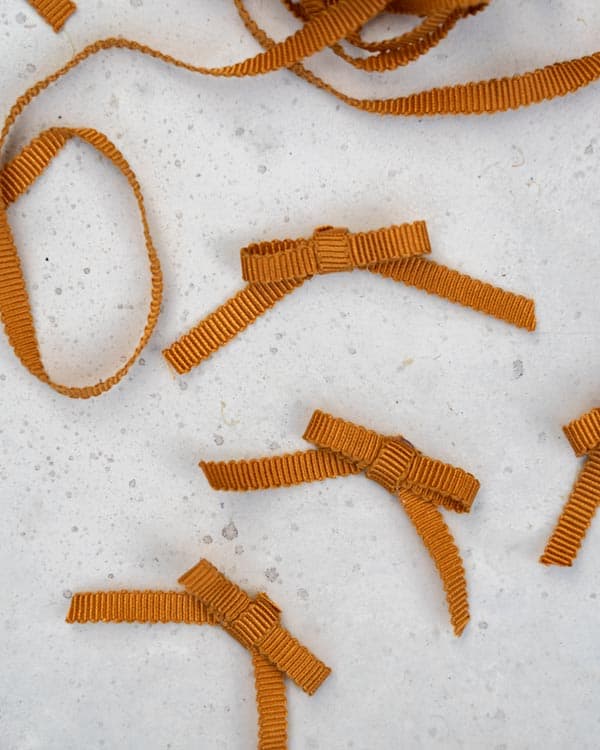
    • Ribbon or Twine – the ribbon you see in the image that I used is by Peter Sham and it’s absolutely beautiful. I am using the quarter inch width. You can use whatever you prefer. 
    • Floral Wire
    • A pen or pencil – must be smooth and not have ridges on the outside. 

    Process

    1. Print out the name tag template – or make your own. Cut out each name tag. 
    2. Using a smooth sided pencil or pen, curl the edges of the name tag strips in opposite directions. Set aside. 
    3. Cut floral wire into 6 short length, approximately 3 inches each. 
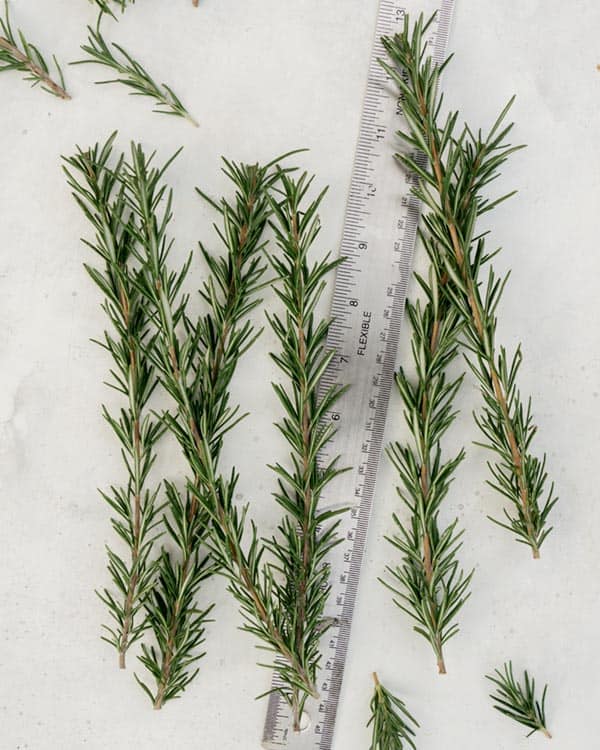
    4. Prepare the rosemary sprigs. First trim each sprig to be between 7 and 9 inches in length. Trim the top of the sprig off first to remove the weak top and get to the thicker stem part of the sprig. Then trim the bottom to get the total length to be between 7 and 9 inches. 
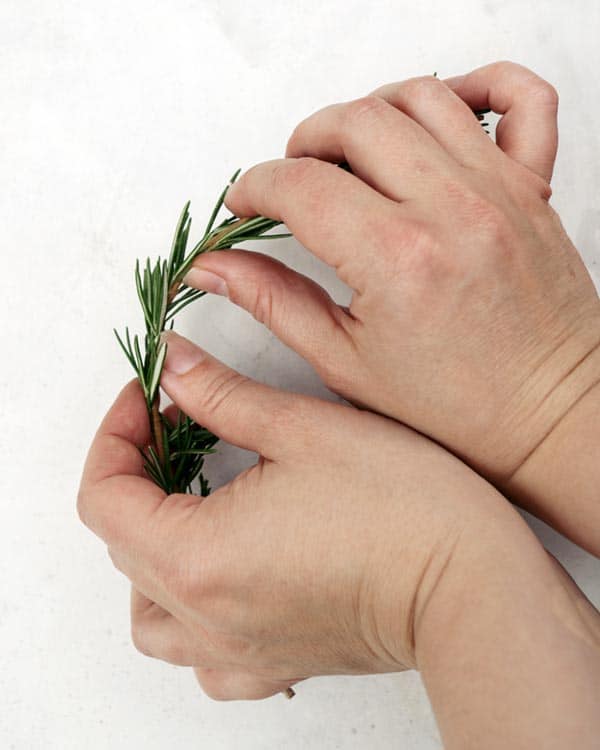
    5. Remove rosemary leaves at the top and bottom of each sprig, revealing approximately a quarter to a half and inch of bare stem on each end. 
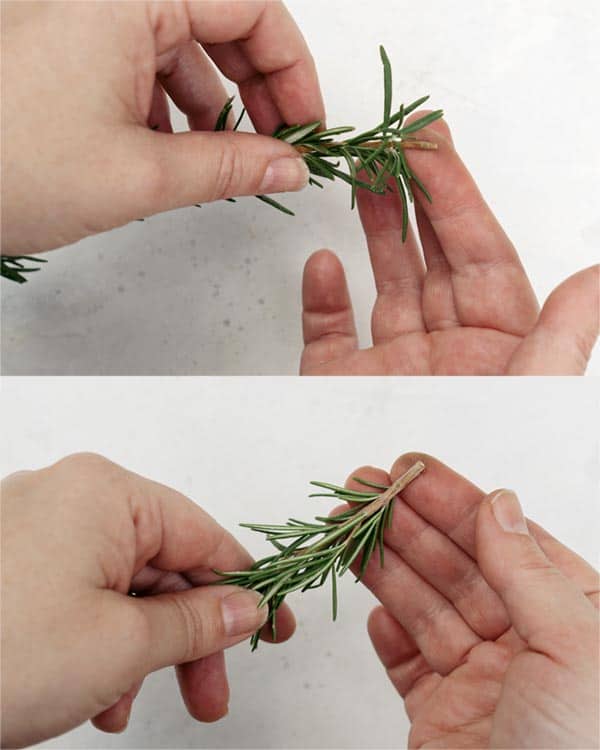
    6. Working from the thickest part of the stem to the thinnest, gently flex the sprig with your fingers to make it more pliable. 
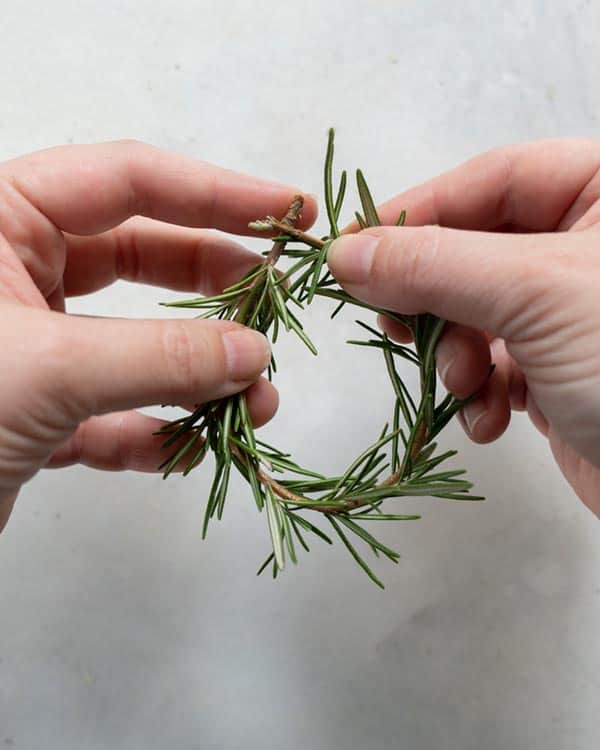
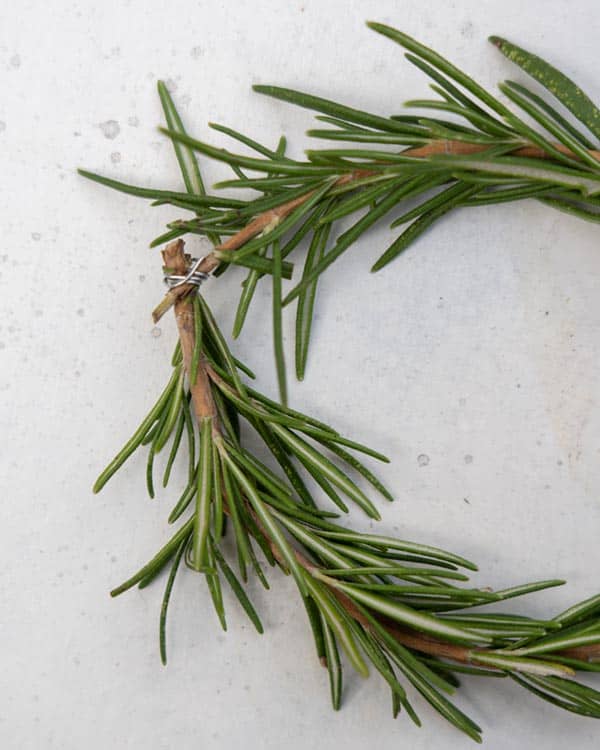
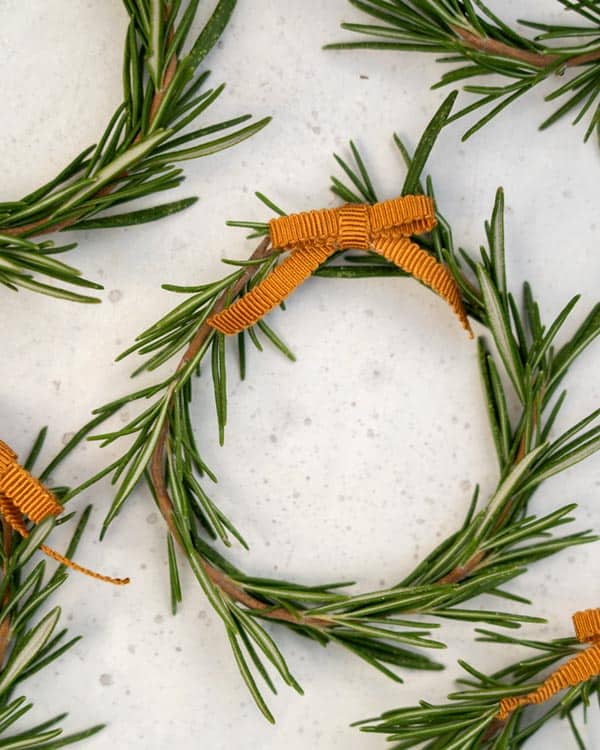
    7. Grab each end of the sprig and make a circle by crossing the two ends. Secure with the pre cut floral wire by winding it around the two ends together, 
    8. Tie a ribbon or twine around the floral wire to cover it and make a bow. You can also hot a glue a pre-made bow to the top of the wreath as well. 
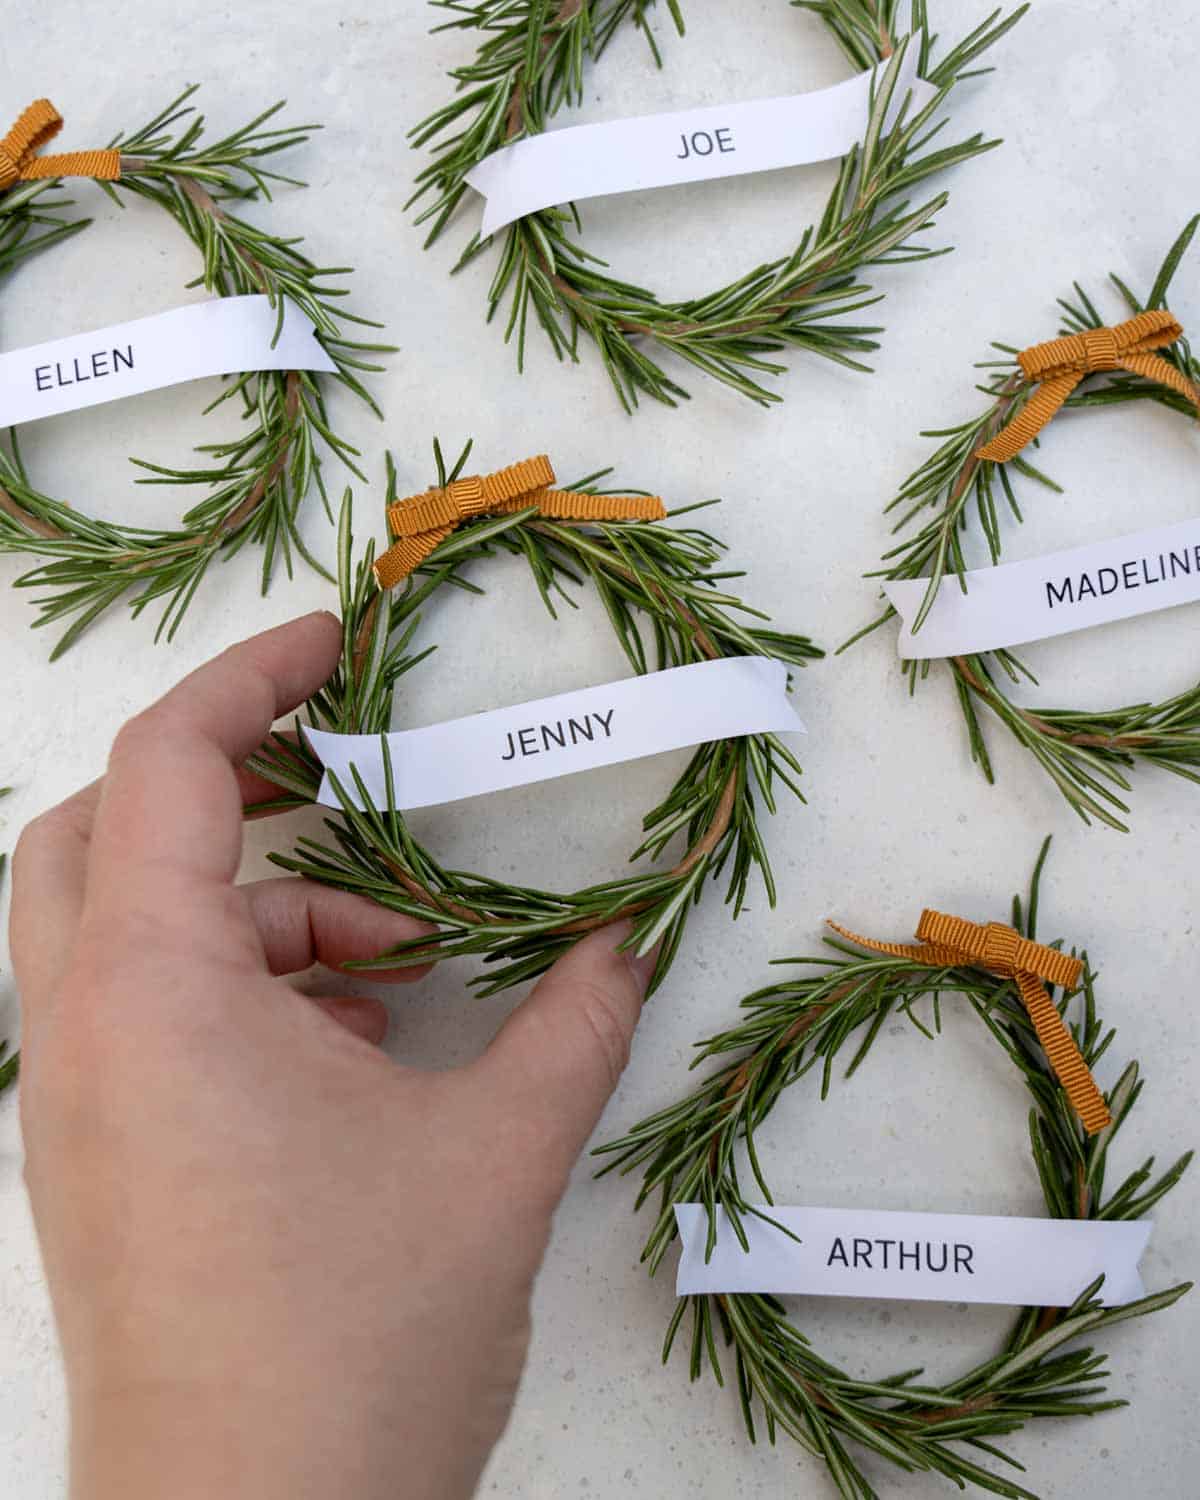
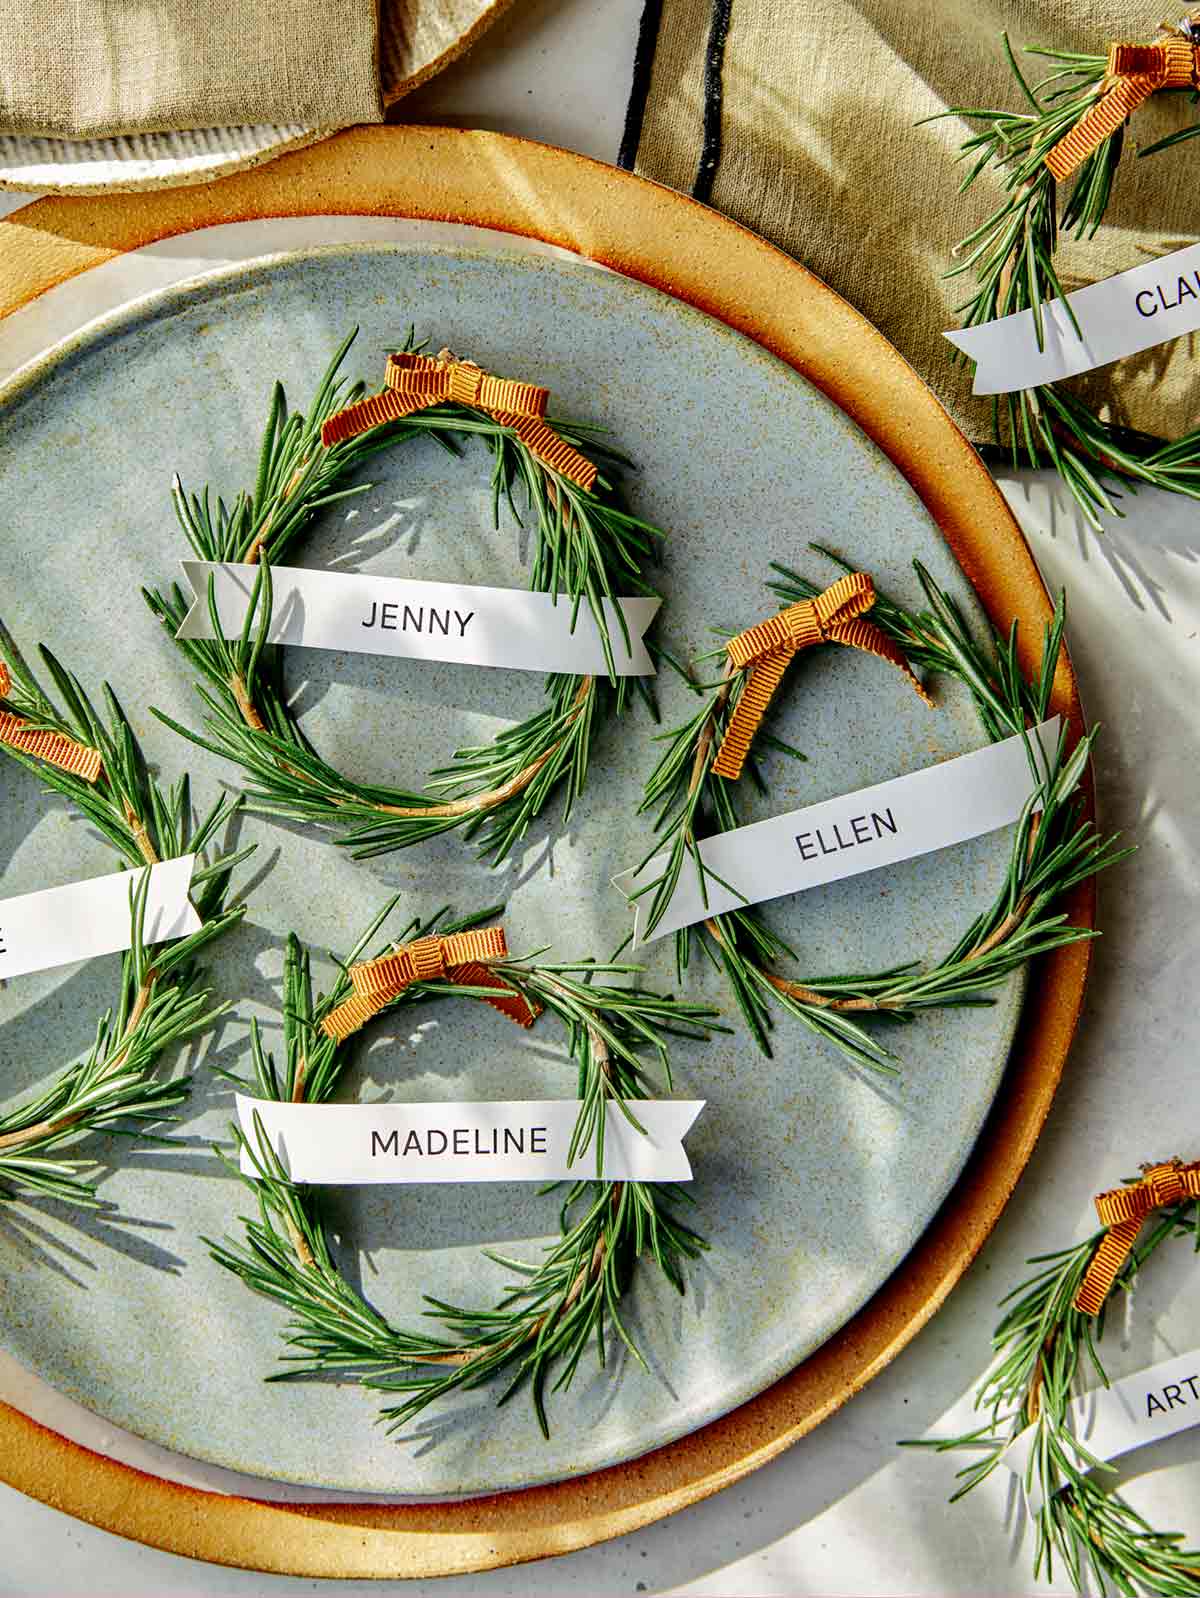
    9. Tuck the curled name tags into the rosemary leaves, and then enjoy your rosemary wreaths. 
    Name tags for Rosemary Wreath Place Cards DIY.
    Print and cut our your name tags.
    Curling the edges of name tags with a pen.
    Curl the edges of the name tags in opposite directions with a smooth sided pen or pencil.
    Floral wire cut into six short lengths with scissors next to it.
    Cut floral wire into size 3″ lengths.
    Measuring rosemary sprigs with a ruler.
    Measure the rosemary springs and trim the top and bottom so each sprig measures about 7 to 9 inches.
    Peeling of rosemary leaves on either side of the stems.
    Peel off rosemary leaves on either end of each sprig so you get a bare stem.
    Bend the rosemary sprigs with your hands to make it able to go into a circle.
    Bend the rosemary sprigs to make them more pliable.
    Making a rosemary wreath.
    Cross the two ends together.
    Attaching the ends of a rosemary sprig with floral wire to make a wreath.
    Attach the ends together using floral wire.
    Bows made out of mustard colored ribbon.
    Pre-make bows our of your ribbon – or you can tie a bowl around with wreath.
    Close up on a single rosemary wreath.
    Using a glue dot secure your bowl. If you would rather just tie twine or ribbon abound the wreath that works great too!
    Rosemary wreaths all laid out on a surface.

    Tips and Tricks

    • If you don’t have floral wire, you can use twist ties.
    • You can make these ahead! Depending on how fresh your rosemary is, these will last for about 5 days. You can store them in the refrigerator on a baking sheet in a single layer. Place a damp paper towel over the top and replace as needed.

    Rosemary Sprig Tips

    • It is better to try and purchase rosemary sprigs that come in a bundle and not in a plastic clamshell. That way you will be able to get the longest sprigs possible. Farmers markets are a great place to get longer rosemary sprigs. If you have a neighbor with a big plant – hit them up!
    • The sprigs that work best are the ones with a single stem. If you get some other sprigs that have some sprigs coming off the main stem go ahead and just trim those off.
    • My favorite way to wash rosemary is by filling the sink with about two inches of water and letting them soak for a little. You can move them around in the water and then dry them with a towel. This gets them very clean!
    • When you are flexing the rosemary sprigs to make them more pliable, do this carefully and little by little. You want to avoid snapping the stem because it will make your wreath crooked.
    Rosemary wreath place cards with plates and linens.
    Rosemary wreath place card up close on a plate.

    More DIYs you will love!

    • Rosemary Wreath Gift Toppers
    • DIY Mini Wreath Place Cards
    • Cement and Wood Place Card DIY
    • DIY Place Cards
    Rosemary wreath place cards on napkins on plates.
    Rosemary wreath place cards on a napkin on a plates.

    Check out of Rosemary Wreath Place Card Google Web Story.

    Hungry for more?

    Subscribe to never miss a recipe. Follow along on Instagram, Facebook, Twitter, and Pinterest.

    Rosemary wreath place cards on a platter with a napkin.

    Rosemary Wreath Place Cards

    A really simple DIY to make Rosemary Wreath Place Cards. These go perfect with any thanksgiving or holiday table! This DIY needs only a handful of supplies to make.
    DIY BY Teri & Jenny
    PRINT HOW TO
    5 from 1 vote
    Prep Time: 10 minutes mins
    Active Time: 20 minutes mins
    Total Time: 30 minutes mins
    Servings: 6

      EQUIPMENT  

    • Rosemary sprigs
    • Printed Name Tags (or strips of paper to hand write names)
    • Scissors
    • Floral Wire
    • Ribbon or Twine
    • Pen or pencil that is smooth sided
    • Hot Glue Gun (optional)

      SUPPLIES  

    • 6 Rosemary Sprigs
    • 6 Name tag strips- 3.75" x .5" each Printed from this template – or your own.
    • Scissors
    • Floral Wire
    • Ribbon or twine
    • Pen or pencil that has smooth sides
    • Hot glue gun optional

      INSTRUCTIONS  

    • Print my name tag template. You can either hand write in the names, or add them in on the computer. Cut out each name tag. If you are making your own, cut strips of paper to be approximately 3.75" x .5".
    • Using a pencil, small dowel, or a pen that has smooth sides. Curl the edges of the name tags in opposite directions.
    • Cut the floral wire into 6 lengths approximately 3 inches each.
    • Trim rosemary springs into lengths between 7 and 9 inches. First trim the top off, then the bottom. When you trim the top, you want to try and get down to the thicker stalk part of the sprig, that way when you wire it, it will hold much better.
    • Remove rosemary leaves at the top and bottom of the sprig to reveal a half inch or a quarter in of stick. This is where you will wind the floral wire.
    • Working from the thickest part of the sprig to the thinner, gently flex the sprig to make it more pliable.
    • Gently make a circle by crossing the two ends of the rosemary sprig. Wind the pre cut floral wire around the ends.
    • Tie a ribbon or twine, or hot glue a ribbon to the rosemary wreath to cover the floral wire.
    • Tuck the name tags within the rosemary leaves. Enjoy your rosemary wreaths!

      NOTES  

    Depending on the freshness of your rosemary – these will last up to 5 days in the refrigerator. Store in a single layer under damn paper towels to keep the leaves looking nice. Replace the damp paper towels once a day. 

    You Might Also Love...

    • Rosemary Sprig Place Card DIY on a table setting.Rosemary Sprig Place Cards
    • Dehydrated citrus on a surface on plates with fresh citrus.Dehydrated Citrus Wheels
    • Mini Wreath Place cards DIY on a plate for a special occasion.Mini Wreath Place Cards – DIY

    November 12, 2020 / 88 Comments

    About Teri Lyn Fisher

    Teri Lyn Fisher is half of Spoon Fork Bacon. She is also a food and cosmetics photographer. She is a big fan of hot dogs. #sfbTERI

    Previous Post: < Previous Post Mushroom and Sage Stuffing
    Next Post: Rosemary Sprig Place Cards Next Post >

    Reader Interactions

    November 12, 2020 / 88 Comments

    Comments

      5 from 1 vote (1 rating without comment)

      Leave a Reply Cancel reply

      Your email address will not be published. Required fields are marked *

      Recipe Rating


      Did you make this recipe? We want to see!

      tag @SpoonForkBacon and #SpoonForkBacon on Instagram

    1. Alison Oscar

      October 25, 2013 at 8:43 am

      I love the Hannah font but do not have it on my computer. Can you email the font to me? I would be so appreciative! Thank you! Alison

      Reply
      • Teri Lyn Fisher

        October 25, 2013 at 9:06 am

        You can just buy it. Gotta support the artist who designed it!

        Reply
    2. Alexandra

      October 25, 2013 at 5:04 am

      what a great idea. so simple and yet beautiful.

      Reply
    3. Julie @ Creating This Life

      October 24, 2013 at 9:12 am

      I love these. So simple and so organic. Now to find a bunch of rosemary…

      Reply
    4. Lucie @ BCtinykitchen

      October 24, 2013 at 1:31 am

      Such a lovely idea! I am planning my wedding at the moment and have been looking for place setting inspiration, I wonder if lavender would work too? I could have lavender for the ladies and rosemary for the men.

      Reply
    5. jessica

      October 23, 2013 at 2:13 pm

      LOVE this! Do you mind me asking, where did you find those napkins? They are perfect!

      Reply
    6. Kathryn

      October 23, 2013 at 11:07 am

      Adorable. I like the napkin ring idea maybe with the name tags tied on the little bows (and possibly a little bell too) I think ill try this for thanksgiving. Thanks so much <3

      Reply
    7. Amanda

      October 23, 2013 at 6:58 am

      These are super cute!

      Reply
    8. Lauren

      October 22, 2013 at 7:30 pm

      Hi again! I commented yesterday about hosting a Tapas Thanksgiving for my girl friends and I. I wanted it to be anything but tradtional and you always seem to have the most fun and creative ideas! I’d love if you would hop over to my post and see if you have any thoughts on what I’ve come up with so far or if you have ideas yourself to make this dinner party incredible!

      http://www.inbetweenmimosas.blogspot.com

      (psst…there may be an idea for a thanksgiving take on poutine…)

      Reply
    9. Cate Holst

      October 22, 2013 at 5:55 pm

      Just gorgeous!

      Reply
    10. saucy gander

      October 22, 2013 at 2:53 pm

      Ooooh love! Keeping this idea for Christmas!

      Reply
    11. Alyssa

      October 22, 2013 at 11:34 am

      I am obsessed. Thanks for sharing!!!!

      Reply
    12. ELBKÖCHIN

      October 22, 2013 at 6:28 am

      Very nice!!! Thanks!

      Reply
    13. Tieghan

      October 21, 2013 at 7:14 pm

      I love this idea! I am so doing it for Thanksgiving!

      Reply
    14. Mary Ann

      October 21, 2013 at 2:29 pm

      Simple, rustic, and a great way to decorate a harvest table. I will do this with my rosemary from the garden and feel really crafty doing it!

      Reply
    15. Lauren

      October 21, 2013 at 1:41 pm

      What a fabulous idea! I’m in the works of planning a small Thanksgiving with my girl friends and this would be perfect. I’ve always loved your tiny food party inspiration so my thought is to have everyone bring Thanksgiving inspired hors d’oeurves instead of going all out twice. Looking forward to getting more ideas from your blog as the big day approaches!

      Reply
    16. Karen

      October 21, 2013 at 12:57 pm

      Such a cute idea! Now I have something else to do with my crazy huge rosemary plant! And we usually host Thanksgiving at our house, so this will be perfect for each place setting! :)

      Reply
    17. Glenda

      October 21, 2013 at 12:46 pm

      I love, love, love, love this idea!! Thank you for sharing this :)

      Reply
    18. Mary

      October 21, 2013 at 12:00 pm

      OOOH, I love these little wreaths,do you think the scent would be overwhelming if I hung them on my cut Christmas tree and tied little red satin bows on them instead of twine. Would the scent with fresh pine be too much?

      Reply
      • Teri Lyn Fisher

        October 21, 2013 at 12:10 pm

        Sounds so cute! I really don’t. While the rosemary is pretty fragrant, it’s not overwhelming.

        Reply
    19. Aimee @ Simple Bites

      October 21, 2013 at 11:50 am

      Super sweet! I love using natural elements for decorations.

      Reply
    20. Laura (Tutti Dolci)

      October 21, 2013 at 11:06 am

      Such a cute idea!

      Reply
    21. Prudy @ butter, basil, and breadcrumbs

      October 21, 2013 at 10:08 am

      LOVE this!!! So, SO pretty! Thank you for sharing!! :-)

      Reply
    22. tahnycooks

      October 21, 2013 at 10:03 am

      Super Cute! I think I can even handle this craft!

      Reply
    23. decocinasytacones

      October 21, 2013 at 9:36 am

      What a great idea for the Christmas table.
      If I make them..I´ll let you know.
      THANKS FOR SHARING!!
      Love from Spain
      Marialuisa

      Reply
    24. Stefanie @ Sarcastic Cooking

      October 21, 2013 at 9:34 am

      This is such a cute and clever idea!

      Reply
    25. kathleen white

      October 21, 2013 at 9:01 am

      Bravo I lpve this! thx

      Reply
      • Joan

        November 15, 2013 at 11:53 am

        How far in advance of Thanksgiving can I make these Rosemary Napkin Rings?
        Should I put them in the Refrig. after I make them?

        Reply
        • Teri Lyn Fisher

          November 15, 2013 at 12:29 pm

          You can make them three days or maybe 4 in advance. Store them (without the paper) on a cookie sheet in the fridge covered with a damp paper towel. Refreshing the paper towel a couple of times would help too!

          Reply
      • Ali

        January 09, 2015 at 3:27 pm

        I saw this exact tutorial and pictures on a Swedish website but couldn’t read it. Thanks for the translation.

        Reply
    Newer Comments »

    Primary Sidebar

    HI! WE ARE GLAD YOU'RE HERE!

    Teri and Jenny of Spoon Fork Bacon

    We hope you find something you love in
    our little corner of the internet.
    XOXOXO, Teri + Jenny

    ABOUT US

    As Featured On

    A complication of logos showcasing where Spoon Fork Bacon has been featured. Including delish, today show, cosmopolitan, good morning america, domino, good housekeeping, william sonoma, and country living.

    Asian Inspired

    BBQ

    PORK

    DESSERT

    For Dinner Tonight

    • Chicken sausage gumbo recipe in two bowls with rice. Chicken and Sausage Gumbo
    • Mongolian Beef recipe in a platter ready to be served. Mongolian Beef Recipe
    • Air fryer chicken skewers on a platter with green onions on top. Honey Garlic Chicken Skewers (Air Fryer Recipe)
    • Cashew chicken recipe in a skillet with rice on the side. Cashew Chicken
    • Tallarines Verde in a bowl with queso fresco on top. Tallarines Verde (Peruvian Green Spaghetti)
    • Panko crusted lamb chop recipe on a plate. Panko-Crusted Lamb Chops Recipe

    Popular Now

    • Baked egg boats with a knife. Baked Egg Boats
    • A sliced bacon, cheddar, and chive quiche with hash brown crust. Hash Brown Crust Bacon and Cheddar Quiche
    • An oval baking dish of cheesy root vegetable gratin with a spoon. Cheesy Root Vegetable Gratin
    • Mongolian Beef recipe in a platter ready to be served. Mongolian Beef Recipe
    • Bowls of broccoli cheddar soup with a spoon. Easy Broccoli Cheddar Soup
    • Panfried potstickers with ramekin of sauce. Potstickers

    Footer

    As Featured On
    As featured on graphic.

    GET NEW RECIPES DELIVERED TO YOUR INBOX!

    Thank you!

    You have successfully joined our subscriber list.

    Footer

    • Facebook
    • Instagram
    • Pinterest
    • RSS Feed
    • Twitter
    • TikTok

    All content including images © 2011-2022 Teri Lyn Fisher & Jenny Park. Stealing is bad karma.

    Spoon Fork Bacon contains paid advertising banners and occasionally affiliate links, and sponsored posts.
    As an Amazon Associate I earn from qualifying purchases.

    Sponsored posts are indicated at the start of such posts. All of our opinions are always our own.
    Thank you for supporting our sponsors. It helps us pay to run this site and bring you unique and original recipes.

    Privacy Policy | Accessibility Statement

    Rosemary Wreath Place Card on a plate in a table setting.
    Rosemary wreath place cards on a napkin on a plates.
    Rosemary wreath place cards on napkins on plates.
    Rosemary wreath place cards on a platter with a napkin.
    Rosemary wreath place card up close on a plate.
    Six rosemary wreath place cards on a table spread out.
    Rosemary wreath place cards on a platter with a napkin.
    Rosemary wreath place cards with plates and linens.
    Rosemary Wreath Place Card on a plate in a table setting.

    Rate This Recipe

    Your vote:


    A rating is required
    A name is required
    An email is required

    Recipe Ratings without Comment

    Something went wrong. Please try again.