


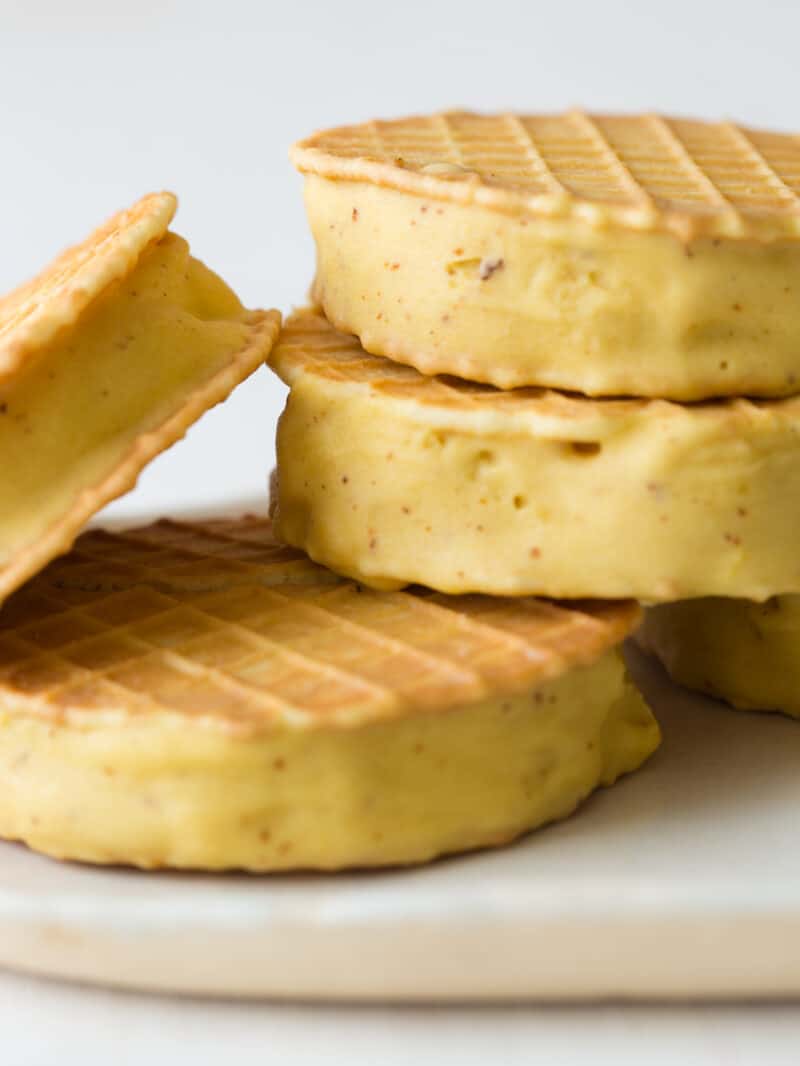
 Today we have two super simple recipes for homemade ice cream cones! I love a good waffle and sugar cone, but it’s hardly difficult to make at home. If I’m feeling particularly lazy, I’ll put the freshly baked/pressed discs into cupcake tin holes to make ice cream cone bowls. A few things to know about making your own ice cream cones, for the waffle cone recipe you’ll need a waffle cone maker…if you don’t have one no worries, you can make the sugar cone recipe which is super tasty!
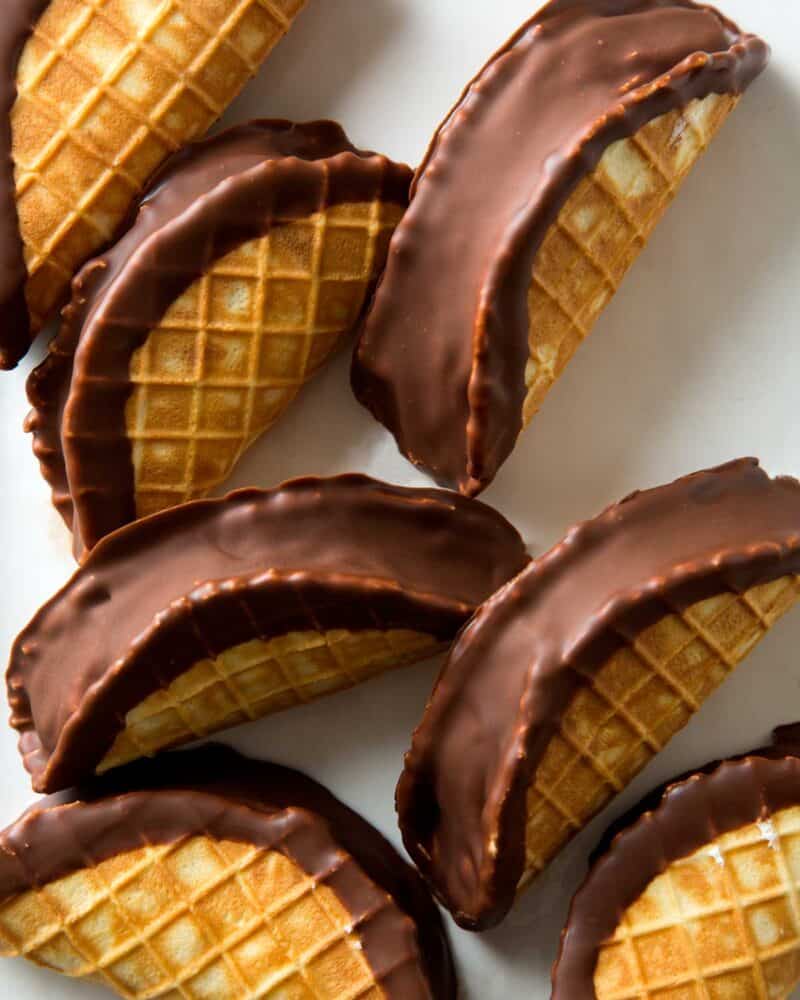
For the sugar cones, I’ve created a stovetop version. You can totally bake these if you’re more familiar and comfortable with that method (350°F for 5 to 7 minutes), but I have found that the cones cook more evenly and stiffen better when cooked on stovetop. I’m not going to lie, although the recipe and method is easy, you need a bit of patience to make your own ice cream cones as you need to make them one by one because they harden super fast. The towel you lay the hot discs onto is super important as you’ll burn you hand pretty bad if you don’t use it to help you roll the cones. One last important tidbit of information is that it’s important for the skillet to be cooled each time you add the sticky batter to allow it to spread easily and evenly. Oh! I Lied! There’s one last super important thing about making your own cones, dipping them in chocolate after they cool. This will totally help prevent major drippage once your ice cream begins to melt.
If you’re feeling a little adventurous and up for the task I recommend making these homemade ice cream cones. They’re really delicious and you’ll feel completely accomplished after you do! Xx, Jenny
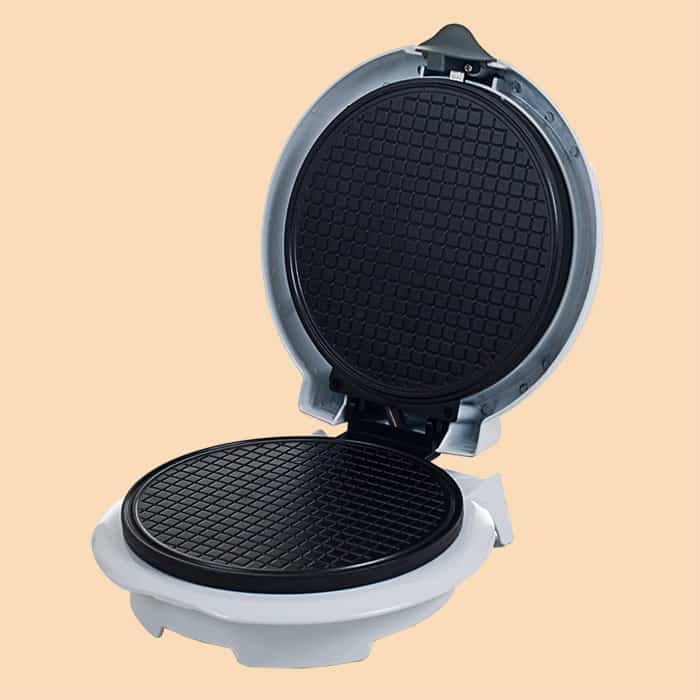
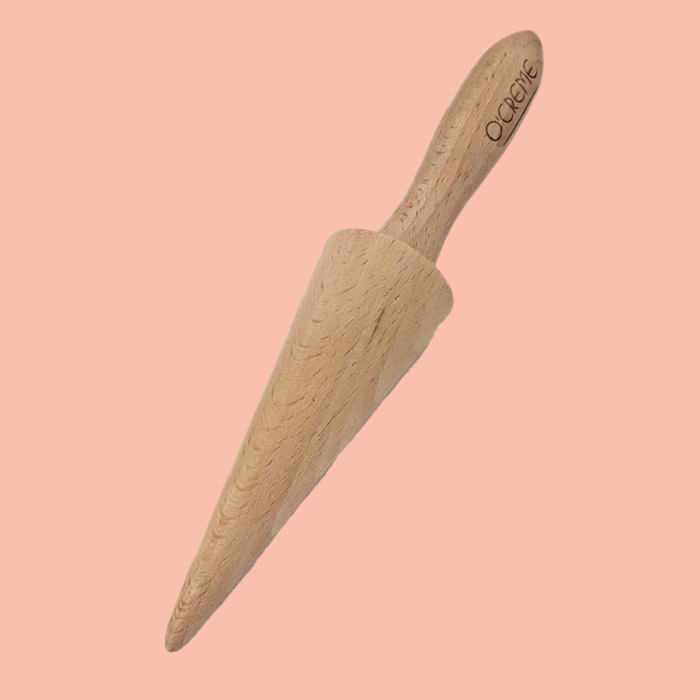
Here are the tools we like for this recipe. Usually the waffle cone iron comes with the plastic waffle cone mold like the one we use in the pictures. The smaller metal one we use is the same size as the wood cone mold lined below.
Other yummy ice cream recipes you might like:

Homemade Ice Cream Cones
EQUIPMENT
- cone rollers
- waffle cone maker
INGREDIENTS
stovetop sugar cones
- 2 large egg whites
- ½ cup superfine sugar
- 3 tablespoons whole milk
- ½ teaspoon vanilla extract
- pinch salt
- ⅔ cup all purpose flour
- 2 tablespoons unsalted butter, melted
waffle cones
- 1 egg
- 1 egg white
- ¼ teaspoon salt
- ¼ cup plus 1 tablespoon superfine sugar
- ½ cup plus 2 tablespoons all purpose flour
- ¼ cup (1/2 stick) unsalted butter, melted
- 2 tablespoons whole milk
- 1 teaspoon vanilla extract
for dipping
- melted semisweet or dark chocolate
INSTRUCTIONS
Stovetop sugar cones
- Place egg whites, sugar, milk, vanilla, and salt into a mixing bowl and whisk together.
- Stir in flour and butter until fully incorporated and batter is smooth.
- Lightly spray a nonstick skillet with a small amount of cooking spray. Pour 2 ½ tablespoons batter into the cold skillet and spread into a thin even layer.
- Place skillet over medium heat and cook for 4 to 5 minutes or until base has set. Flip and continue to cook for 1 to 2 minutes.
- Quickly lay sugar disc onto a clean towel and top with cone roller.
- Using towel and cone roller, roll sugar disc into a cone shape and hold, seam side down for 1 to 2 minutes or until cone cools and hardens. (this must be done quickly as the disc will begin to harden almost immediately after leaving the skillet). Cool skillet and repeat until all batter has been used.
- Cool cones completely before dipping the tips in chocolate and setting on parchment until the chocolate hardens. Carefully store in an airtight container for up to three days.
Waffle cones
- Pour all ingredients into a mixing bowl and whisk together until no lumps remain. Allow mixture to sit for 5 minutes.
- Heat waffle cone maker to desired settings.
- Pour 3 to 3 ½ tablespoons batter into the center of the waffle cone maker and gently press lid closed, completely. Cook waffle cones for 4 to 4 minutes or until golden brown.
- Quickly lay waffle disc onto a clean towel and top with cone roller. Using towel and cone roller, roll waffle disc into a cone shape and hold, seam side down for 1 to 2 minutes or until cone cools and hardens. (this must be done quickly as the disc will begin to harden almost immediately after leaving the skillet). Cool skillet and repeat until all batter has been used.
- Cool cones completely before dipping the tips in chocolate and setting on parchment until the chocolate hardens. Carefully store in an airtight container for up to three days.
Did you make this recipe? We want to see!
tag @SpoonForkBacon and #SpoonForkBacon on Instagram
Hello, I was wondering where we could get the cone mold with the thin handle in the middle you use to roll cones. It seems it makes a larger wider cone. Great images on your site, FYI.
Yes! It does make larger cones! We bought a “waffle cone maker” which came with one…the waffle cone maker itself was about $30, but you can also purchase the “cone forming tool” by itself online for around $10
I use a pizzelle maker It makes a nice flat cookie.
Heyo,
So i have tried to make the stove top sugar cone using a similar recipe before, problem is they didn’t really harden at all just became stiff like cardboard. Can you please tell me what i might have done wrong? Was the batter perhaps not spread thinly enough or something?
Thanks!
Hm, I would recommend turning your heat up more, and definitely the thinner the batter the better!
Is it safe to eat the cones a week after it’s been made?
I think the cones should stay good for up to a week, in an airtight container
hey there,
how can i replace eggs?
i dont want to use eggs
please do rpley
My best guess would be to experiment with powdered egg whites (not sure they’d turn out the same) or get used to a bowl instead of a cone. Eggs are an emulsifier0 not sure how you can eliminate that.
Hi Jenny, I noticed in your recipe for stovetop sugar cones it mentions 2/3 all purpose flour is that teaspoons, tablespoons or cup? :)
Hi kathleen! Thanks gor catching that! It’s cups! :)
Do not want to melt chocolate
Just drop a chocolate kiss upside down into the finished cool cone
Bingo a surprise at the bottom for ice cream lovers
So, this recipe turned out awesome! I didn’t have a cone roller so I used a small coke bottle, one of those 8OZ glass ones. I pressed the end at the bottom with a fork and broke off the end at last crimp after they cooled a bit. I melted some chocolate wafers in a zip baggie set in a cup of boiling water. When the chocolate was melted I cut a corner of the baggie and drizzled the chocolate inside the cone. I Poured the excess into the next cone and continued while adding chocolate as needed. These came out awesome!! Using Magic shell works great if you cant find chocolate melting disks. They are the kind for dipping fruit.
On this Earth Day, I will let you know that using these cones is environmentally friendly: no dish to throw away, because you eat the cone!!
Hi! These look DEE-LISH! But can I make these with a regular waffle maker?
I don’t have an ice cream cone maker and don’t plan on buying one as I barely make cones…
Thanks!
Cupcake Girl
The ridges in a regular waffle maker are a little too deep, but you can try! Another alternative is to bake them free form in a baking sheet lined with a silpat or parchment paper. Good luck!
tried it great idear & tastes good
Wow this is a great idea, I love the idea of making your own ice-cream cones.
What a fun idea! I would love to try this. I bet it makes the kitchen smell fantastic too :)
I loveeee this idea! Seems almost tooo easy… perfect!
Xo
Dana Ivy
http://www.iadorewhatilove.com – Check out my blog!
With all the homemade ice cream recipes out there, we need more delicious cone recipes like this! Spectacular!!
Love this recipe. I’m really lazy. I just put the disc on an inverted bowl. Holds way more ice cream and other stuff.lol
This is something that will be made often here! Time to get more ice cream!
Love the sugar cone recipe! As much as I love waffle cones, you just can’t beat a sugar cone…dying to try this out!
Great recipe! Thanks for showing that I can make these too!
awesome idea!!
Thanks
The thing I love about an ice cream cone is that once you’re finished, there is no evidence that you ate any ice cream at all.
Hahahahaha!!!!
I have been wanting to make these!! So fun!
LOVE that you added the chocolate dip at the bottom!
I need to get on this! These look so fun to make!
Thank you for providing a sugar cone recipe. I sometimes am too lazy to get out my waffle cone marker. I love the choc dipped ends, just like the shops!