These Watercolor Easter Eggs are one of my all time favorite ways to decorate Easter eggs. It’s a really simple process, and you probably already have everything you need to do them. I love decorating these and using them on my Easter table as decoration.
Tips and Tricks for Watercolor Easter Eggs:
- For these to work best, in my experience it s best to make sure the colors you are using are very saturated. If you are using food dye, I use 10- 12 drops in about a cup of water. If you are using other dye, just make sure it is as saturated as it can be. For the lighter colors just add more water.
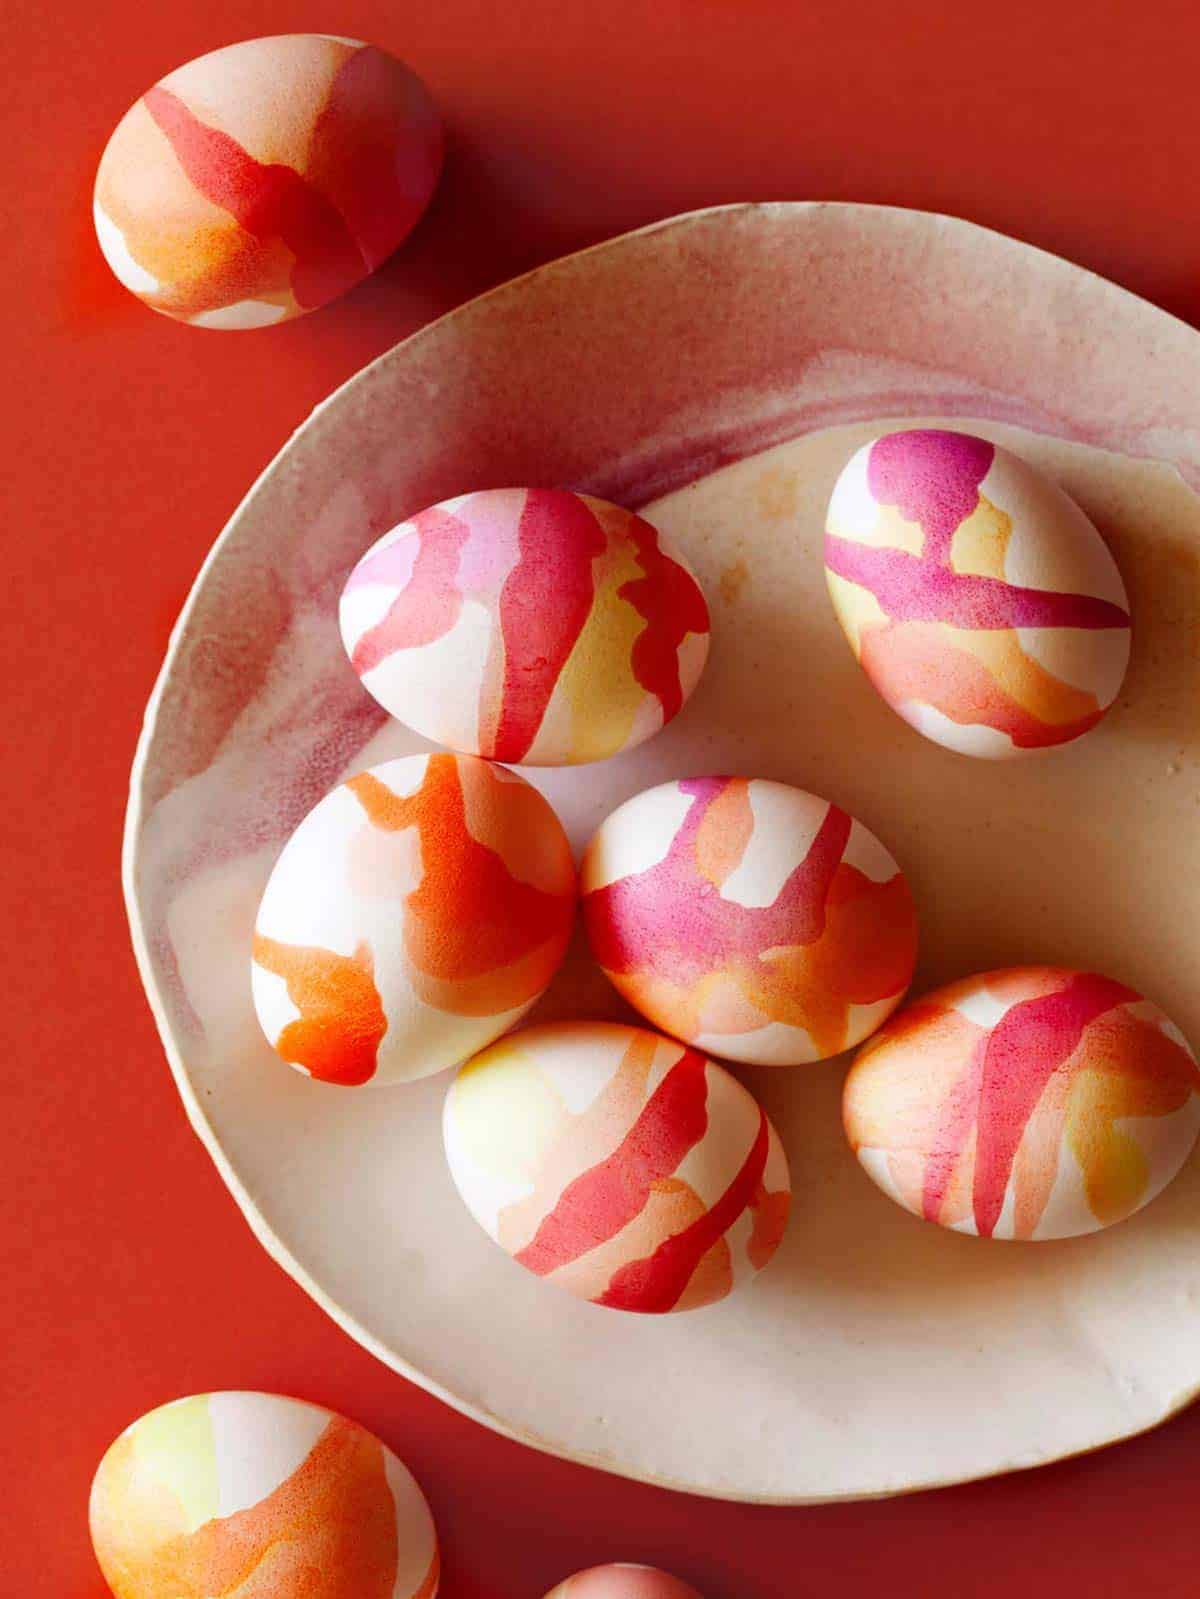
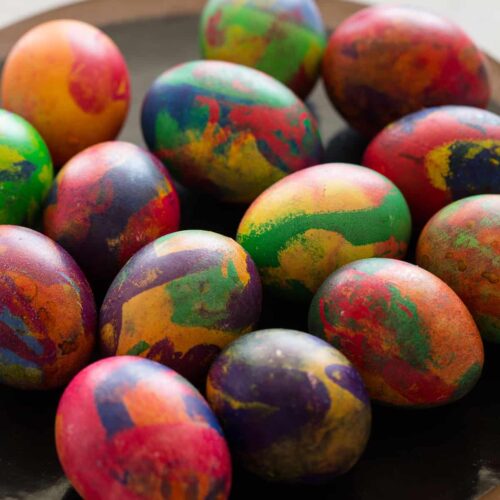
- Starting out with the darker colors, and then layering over the lighter colors seems to work best. I try to cover most of the egg with a couple of good spoonfuls of the darker color and then fill in the gaps with the lighter colors.
- Make sure you are letting your eggs dry in between each layer of color. That way they don’t run together.
- I like to use plastic water bottle caps, or milk jug caps to rest my eggs on when they are drying. That way they don’t roll round.
- If you want to speed up the drying process, you can use a blow dryer to dry the eggs in-between each color layer.
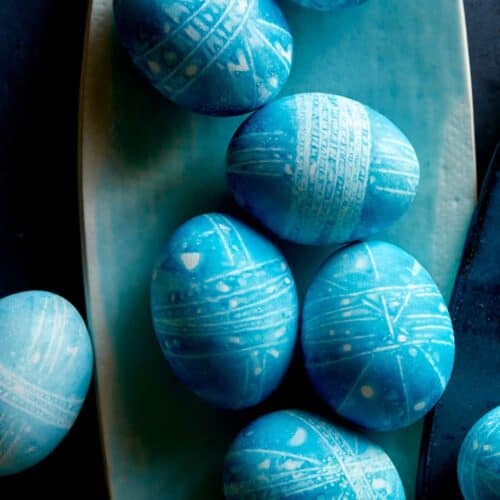
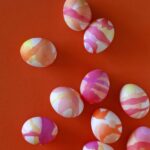
- Batik Dyes are how I got such saturated color in the images within in this post. If you use food coloring, your colors will not be as dark, but will still be beautiful!
Easter Egg Dye
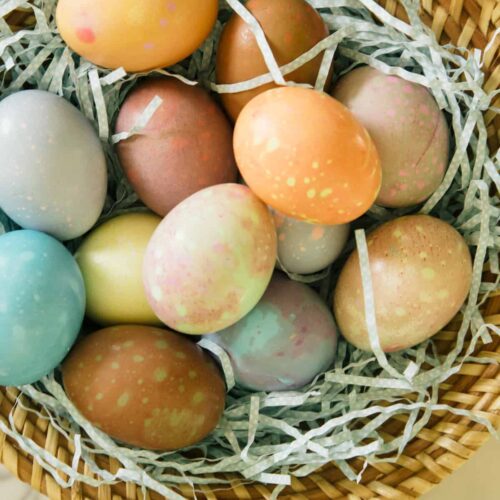
For these Watercolor Easter Eggs I have tried a couple different dyes. Here are some of my recommendations:
- Batik Dyes. In my opinion, these dyes have the best more saturated colors.
- Food dye. This is the more traditional food dye you find in grocery stores, and it works great!
- I also love this Natural Dye Easter Egg Kit.
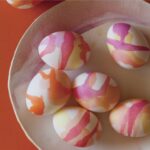
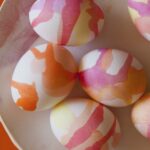
Below I’m using neon food coloring!

How To Dye Easter Eggs Using The Watercolor Technique
Equipment:
- Cups (6 or more)
- Spoons
- Baking Sheet
- Plastic latex gloves (optional)
- Food coloring or other egg dye
- Cooled Hard Boiled Eggs
Process:

Time needed: 1 hour
- Prepare your hard boiled eggs.
Soak your completely cooled hard boiled eggs in a bowl mixed with 50% water and 50% vinegar.
- Prepare your watercolor dye colors.
We recommend a minimum of three different colors. If you are using food coloring, I have found 10-12 drops in one cup of water gives you good color saturation for dark versions of the color. For lighter versions of the color use half as many drops in one cup of water. You want lighter and darker variations of the same color for layering the colors.
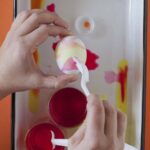
- Dye the eggs using the watercolor technique.
Hold your hard boiled eggs on either ends with one hand. Pour spoonfuls of dye over the eggs. You can do this over the dye cups, or over a baking sheet lined with paper towels. Let dry completely before you repeat with other colors.


Did you make this recipe? We want to see!
tag @SpoonForkBacon and #SpoonForkBacon on Instagram
You are really good with colors. I am gonna try it.
Looks great I will surely try
Yo!! that’s amazing. Short and easy way to make colorful easter eggs.
Thanks.
So Innovative idea. I really love this type of activity. I will definitely try this.
these look fantastic.
These eggs are looking very beautiful. You are very good with colors.
colorful eggs looks beautiful.
Good to know that works too! I learn so much from you as well! Keep it up great post.
So artistic and aesthetic!
Me too… I really love painted eggs! I always paint eggs for easter and it’s always a wonderful moment!
Great Artwork. It is something unique my painting eggs. It’s really a beautiful idea for something like use in a school project.