• Skip to primary navigation
  • Skip to main content
  • Skip to primary sidebar
  • Skip to footer
Spoon Fork BaconSpoon Fork Bacon
  • Navigation Menu: Social Icons

    • Facebook
    • Instagram
    • Pinterest
    • YouTube
    • Twitter
    • TikTok
  • What’s for Dinner?
  • Recipes By Category
  • Most Recent
  • Contact
  • Shop
menu icon
go to homepage
subscribe
search icon
Homepage link
  • Recipes By Category
  • Most Recent
  • What’s for Dinner?
  • Shop
  • Contact
    • Facebook
    • Instagram
    • Pinterest
    • YouTube
    • Twitter
    • TikTok
  • ×

    Home > Blog > DIY > Dehydrated Citrus Garland DIY

    Dehydrated Citrus Garland DIY

    by Teri Lyn Fisher · Published: Dec 10, 2020 · Modified: Sep 24, 2021

    Jump to Instructions Print Instructions
    Our Dehydrated Citrus Garland is so easy and beautiful. We love the pop of color it gives, and it looks stunning when light shines through the back. Use your citrus garland on your Christmas tree, to decorate a window, or on a mantle.
    Dehydrated citrus garland strung up in a kitchen window.
    Dehydrated citrus garland strung up in a kitchen window.
    Dehydrated citrus garland strung up in a kitchen window.
    Citrus garland close up strung up in a window.
    Dehydrated citrus garland strung up in a kitchen window.
    Dehydrated citrus garland above a kitchen sink.

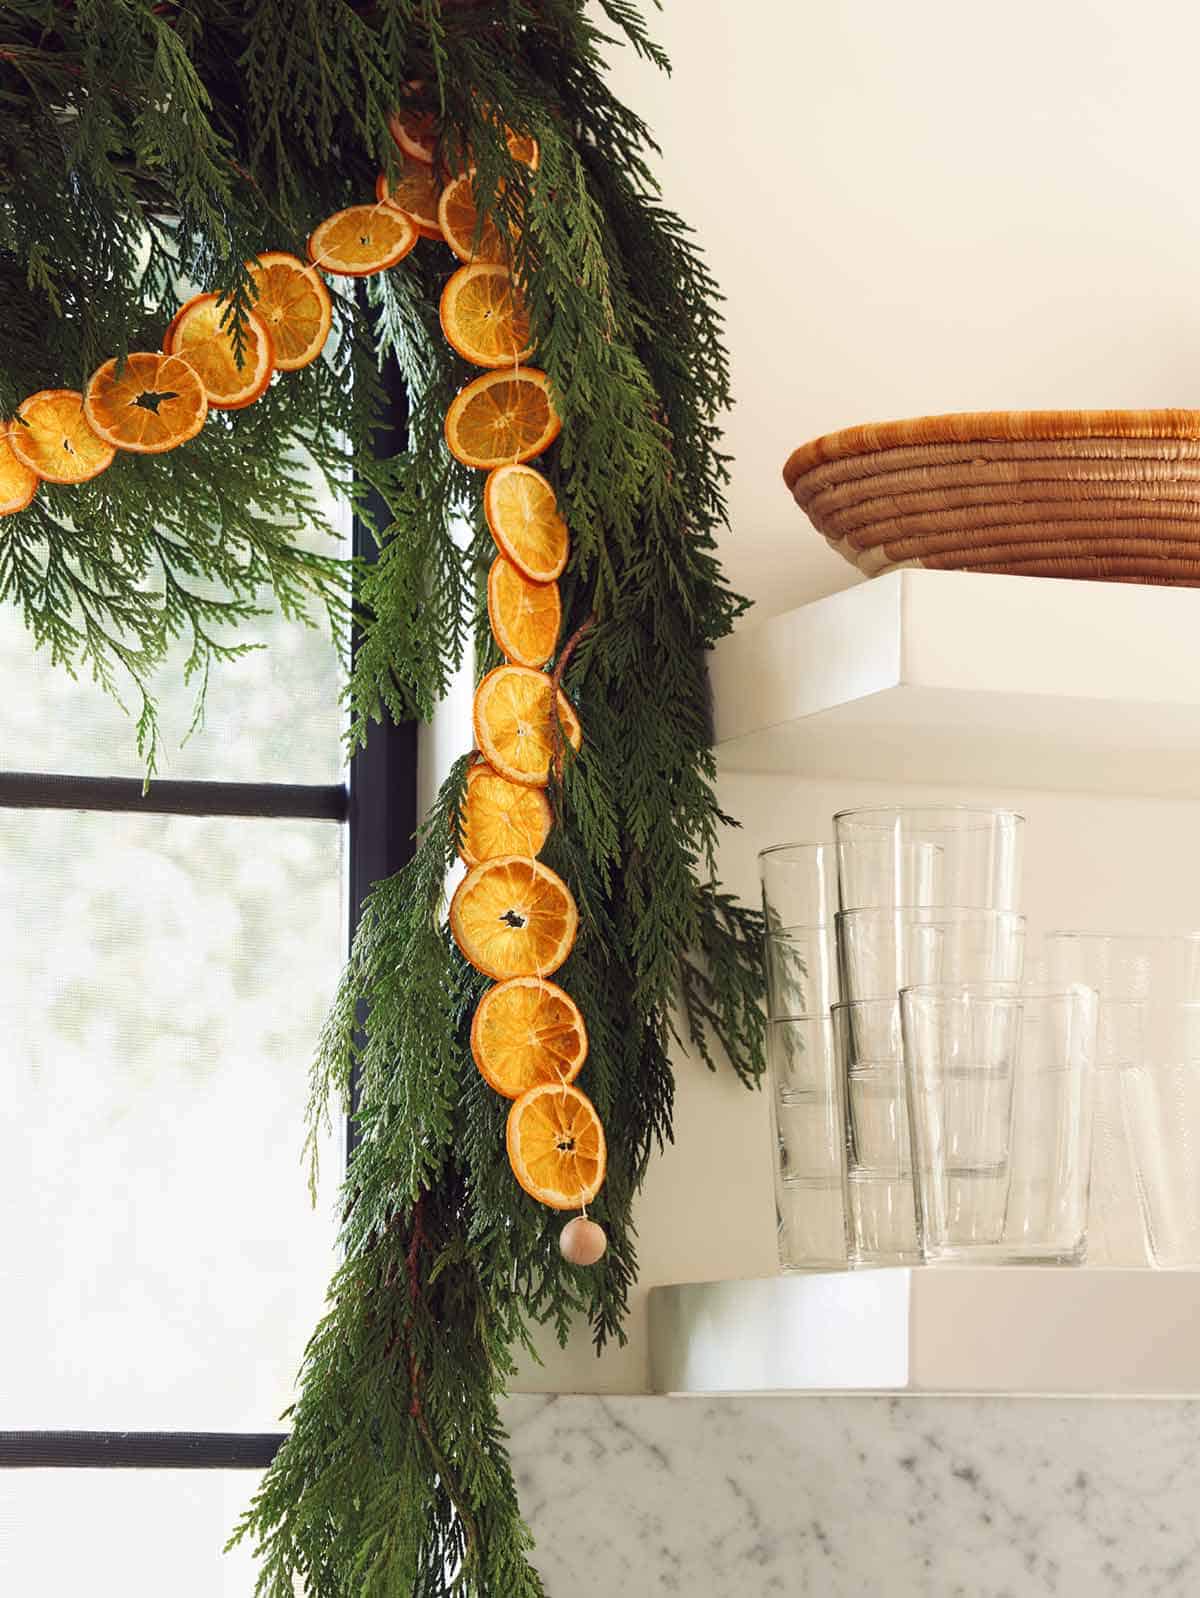
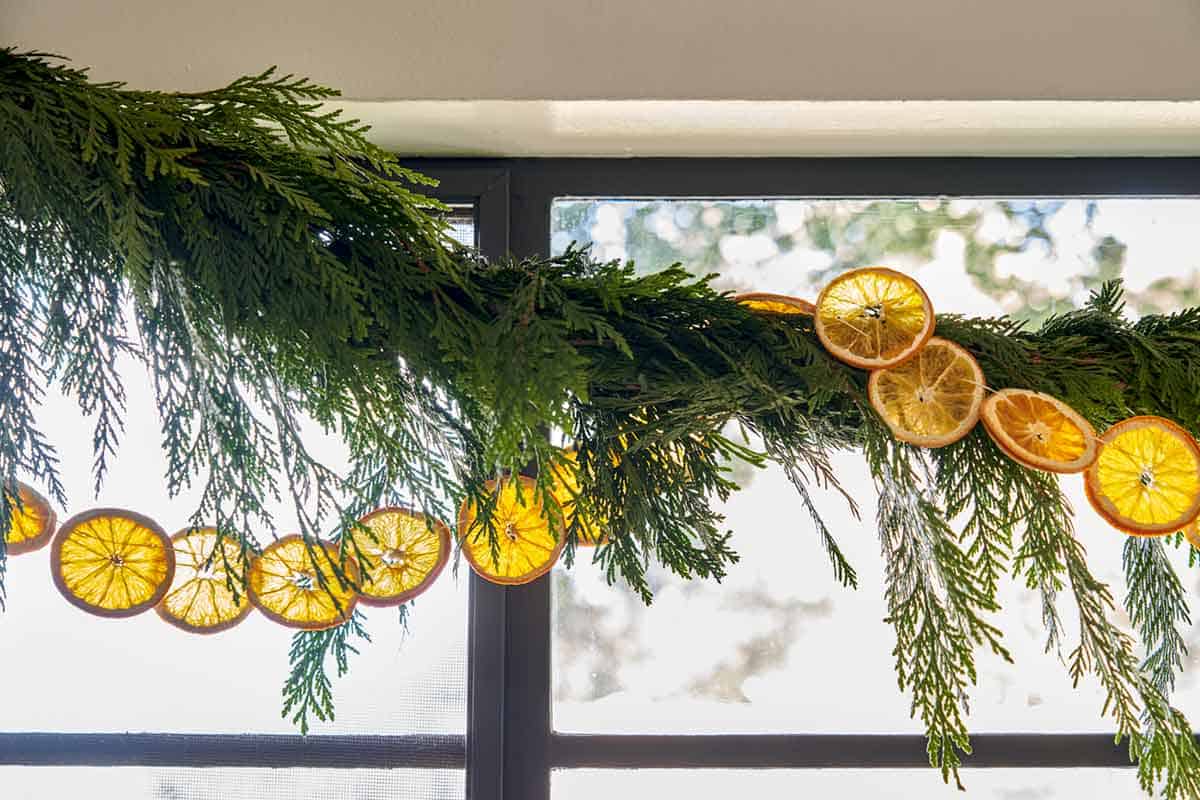
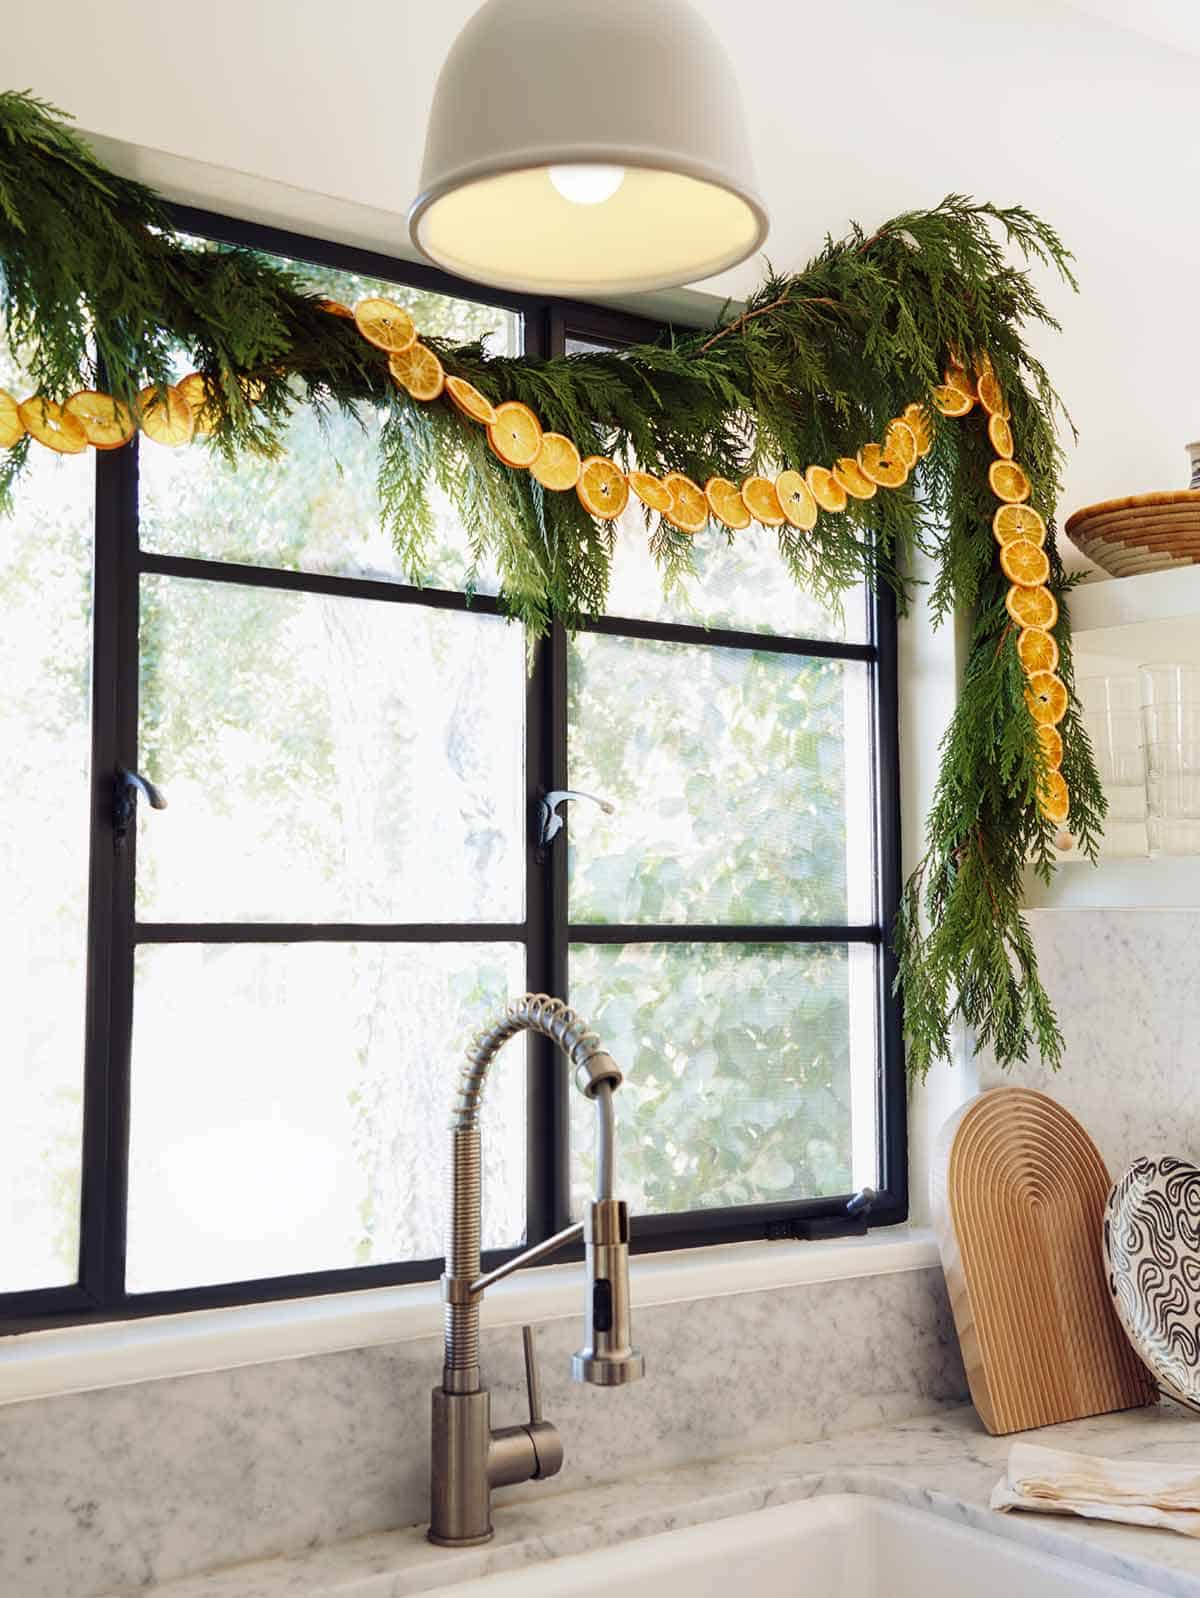
    Our Dehydrated Citrus Wheels are one of the easiest DIYs we have on the blog. Using a batch of dehydrated citrus wheels to make a garland seemed like a no brainer. It’s also a really simple DIY, and it yields such a beautiful result. You can use this Dehydrated Citrus Garland to decorate your tree, or a mantle, or to drape over any window. Using them on a window is my favorite of the choices because I love how they look when the light shines through them.

    Close up on a dehydrated citrus garland in a kitchen.

    How to make Citrus Garland

    Supplies

    Supplies to make Dried Orange Slices.
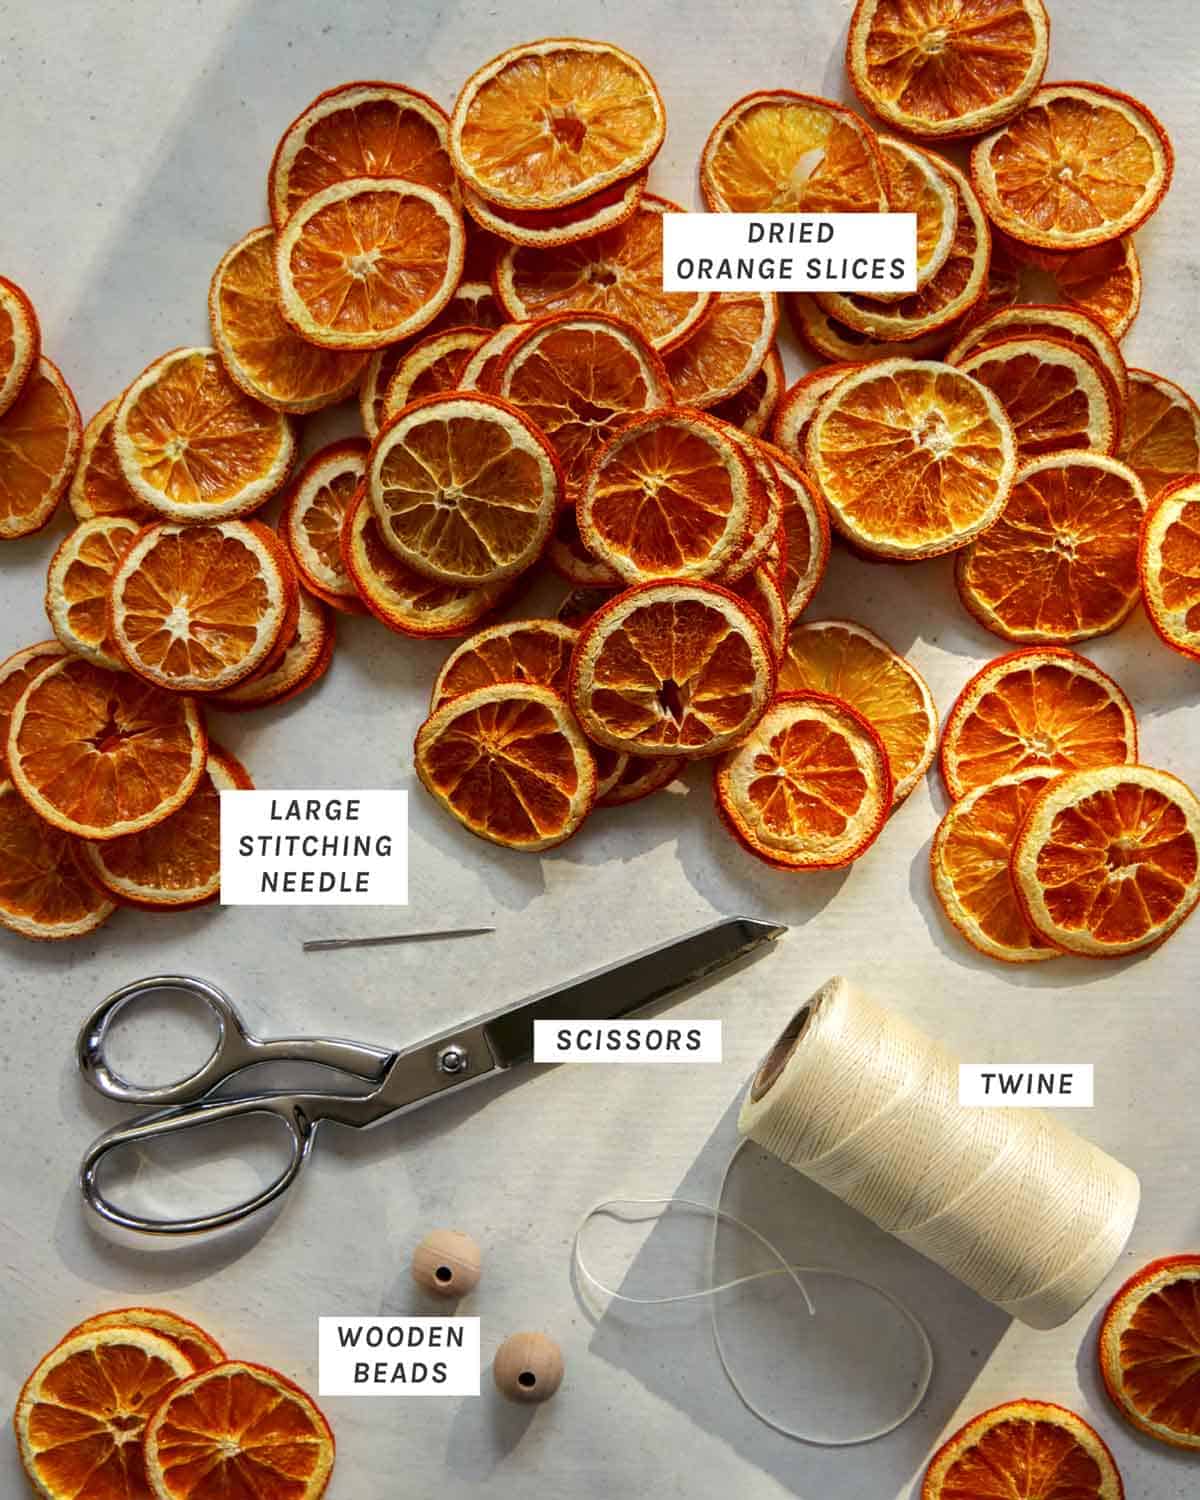
    • Dehydrated Citrus Wheels (I choose orange slices for mine)
    • Large Stitching Needle
    • Twine – Any will do really, but I prefer waxed thread because it slides through the slices nicely, and is strong.
    • Wood Beads
    • Scissors

    How to Dry Citrus for Garland

    A variety of dehydrated citrus wheels on plates.

    Drying or dehydrating citrus for this garland is incredibly easy! It just takes time. Get all the details for how to make your own dehydrated citrus at home. It’s super easy, and your house will smell great!

    Process

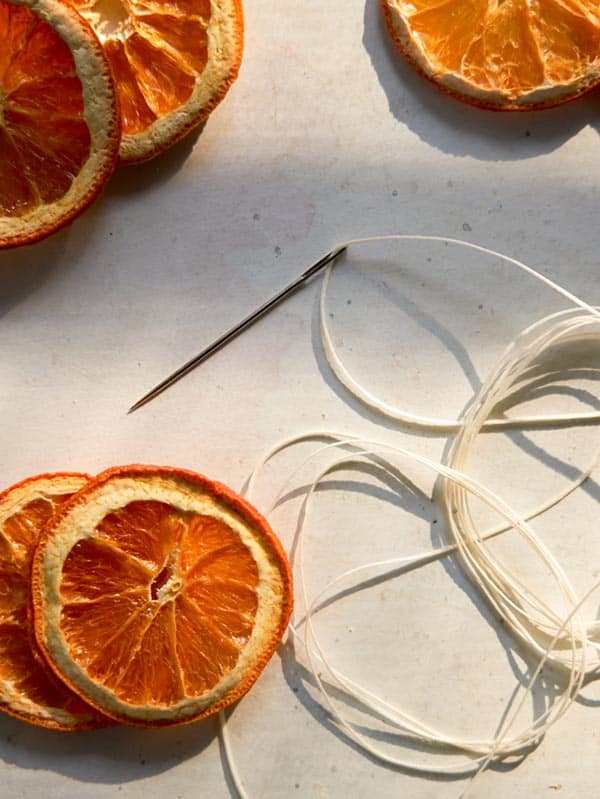
    1. Measure and cut length of twine.
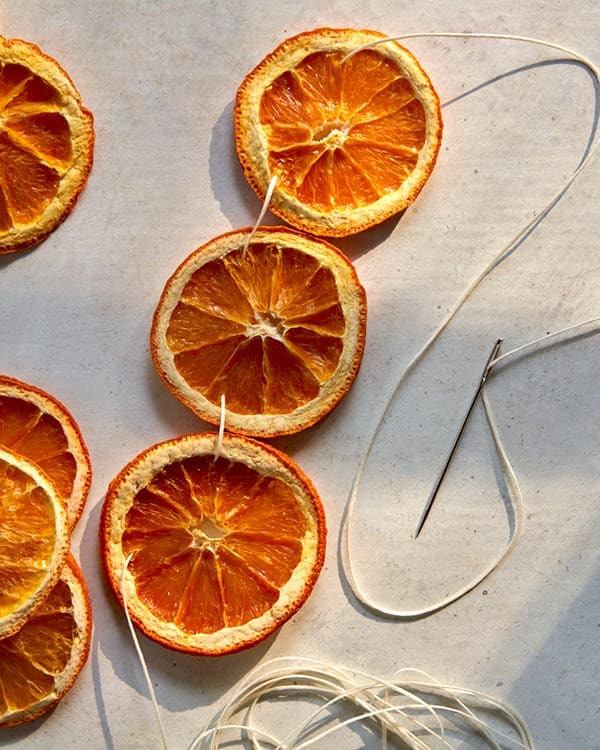
    2. Thread citrus wheels on twine.
    3. Tie the bead onto the end of each twine.
    Twine and scissors with dehydrated citrus around it.
    Cut twine to length.
    Twine with  a needle on one end surrounded by dehydrated citrus wheels.
    Thread the needle with twine.
    Making a citrus garland with a needle and twine.
    The holes should be close to the rind edge.
    Dehydrated citrus wheels strung on twine.
    The holes should also situated above the center on the citrus wheels.
    Dehydrated citrus wheels strung on twine.
    Thread all the citrus until you have 6 inches of twine left on either side.
    Dehydrated citrus strung on twine to make a garland.
    It’s pretty!
    Making a knot at the end of dehydrated citrus.
    Make a knot on the side of the rind of the citrus wheels on the ends of the twine.
    Dehydrated citrus with a knot on the end of one.
    The knot should rest on the edge of the rind.
    A wooden bead at the end of a citrus garland.
    Thread the bead onto the twine.
    A wooden bead strung on the end of citrus garland.
    Loop the twine around a tie a knot. Trim the excess twine.
    A dehydrated citrus garland laid out on a table.
    Admire your work!

    Questions about Citrus Garland

    How long do Citrus Garlands Last?

    They will last two years or maybe longer if they are stored properly. They are best kept in a cool dry place. They will become pale in color and very brittle when it’s ready to make a new one!

    Do Citrus Garlands Smell Good?

    Yes! As time goes by the scent does fade, but freshly dehydrated citrus does smell great!

    Citrus garland strung above a kitchen window.

    Tips and Tricks

    • When you are stringing the citrus, poke the holes in the same direction every time to be sure all the citrus are facing in the same direction.
    • The large stitching needle makes this DIY very quick, however if you don’t have the large stitching needle you can poke the citrus wheels with a toothpick and thread the twine.
    • You can use any twine you have on hand, but this twine is great because it’s really strong, and because it’s waxed it makes sliding the citrus wheels much easier. I thicker, chunkier twine like a hemp twine would make that difficult and you risk cracking the inside of the citrus wheels.
    A close up on citrus garland.

    If you love this easy DIY check out some of our others:

    • DIY Wood Bead Christmas Garland
    • DIY Pasta Gift Wrapping
    • DIY Modern Mini Christmas Tree
    A dehydrated citrus garland strung up above a window in the kitchen.

    Hungry for more?

    Subscribe to never miss a recipe. Follow along on Instagram, Facebook, Twitter, and Pinterest.

    Citrus garland close up strung up in a window.

    Dehydrated Citrus Garland DIY

    Our Dehydrated Citrus Garland is so easy and beautiful. We love the pop of color it gives, and it looks stunning when light shines through the back. Use your citrus garland on your Christmas tree, to decorate a window, or on a mantle.
    DIY BY Teri & Jenny
    PRINT HOW TO
    5 from 2 votes
    Prep Time: 3 mins
    Active Time: 30 mins
    Total Time: 33 mins
    Servings: 1 garland

      EQUIPMENT  

    • Scissors

      SUPPLIES  

    • Dehydrated Citrus Wheels
    • twine
    • large sewing needle
    • 2 wood beads

      INSTRUCTIONS  

    • Measure the length of your desired garland. Cut the twine to length and add 6 inches to either side.
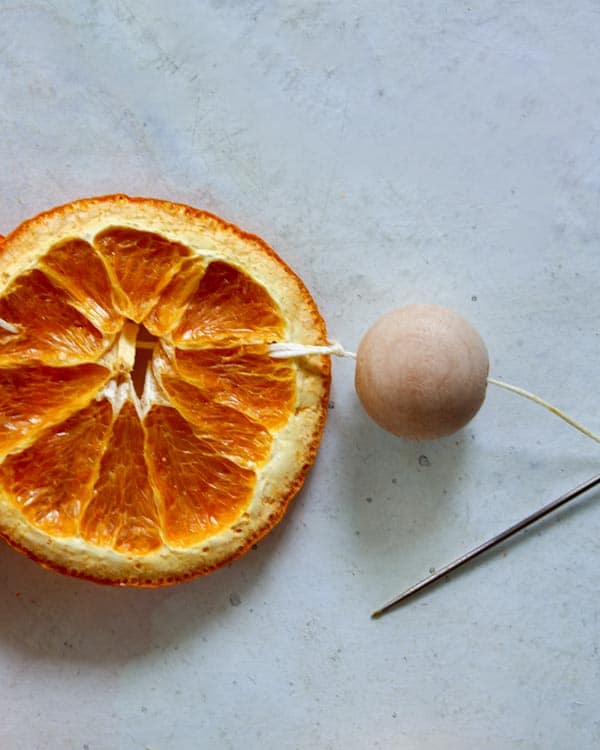
    • Take one end of the twine and thread through the eye of the needle. Begin to thread citrus wheels onto the twine. Make the holes close to the edge of the rind and above the center.
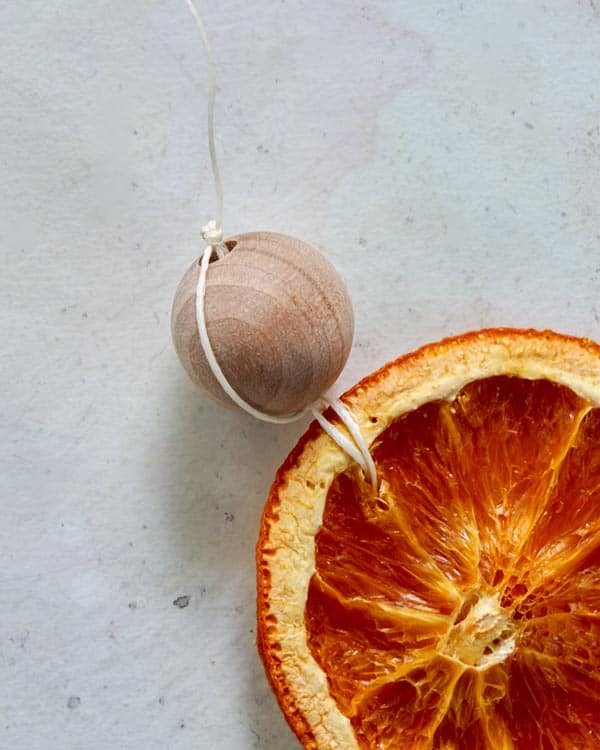
    • Once you have finished stringing your citrus you need to tie a knot on the side of the rind of the last citrus. Do this by looping the twine through the last hole again, and creating a knot. String the wooden bead on the end, and loop the twine around the bead. Tie a knot at the top and trim the excess. Repeat for the other side.
    • Store garland in a cool dark place with padding to prevent the citrus from breaking. The garland will last as long as the color looks nice!

      NOTES  

    When stringing the garland you can poke the holes closer together on the citrus wheels  if you want the citrus wheels to overlap. 
    Making the holes above the center of each citrus wheel helps the garland not twist when it’s hung. 
    When you are stringing the citrus poke the holes away from you  every time, this will make sure you are threading the citrus in the same direction every time.  
    KEYWORD: DIY, garland

    You Might Also Love...

    • A close up of a rosemary wreath gift toppers tied to a round brown gift box.Rosemary Wreath Gift Toppers
    • DIY Christmas garland made of wood beans laid out on a surface.DIY Wood Bead Christmas Garland
    • Dehydrated citrus on a surface on plates with fresh citrus.Dehydrated Citrus Wheels

    December 10, 2020 / 6 Comments

    About Teri Lyn Fisher

    Teri Lyn Fisher is half of Spoon Fork Bacon. She is also a food and cosmetics photographer. She is a big fan of hot dogs. #sfbTERI

    Previous Post: < Previous Post Beef Ragu Recipe
    Next Post: Braised Lamb Shanks Next Post >

    Reader Interactions

    December 10, 2020 / 6 Comments

    Comments

      Leave a Reply Cancel reply

      Your email address will not be published. Required fields are marked *

      Recipe Rating


      Did you make this recipe? We want to see!

      tag @SpoonForkBacon and #SpoonForkBacon on Instagram

    1. Paige

      February 23, 2022 at 4:47 pm

      What is the greenery you use in the picture with the citrus garland?

      Reply
      • Teri Lyn Fisher

        February 24, 2022 at 4:09 pm

        It’s cedar garland.

        Reply
    2. Shannon

      November 27, 2021 at 4:16 pm

      This looks amazing. How many oranges did your garland need for your kitchen window?

      Reply
      • Teri Lyn Fisher

        November 29, 2021 at 2:25 pm

        Hi Shannon I am really not sure because it depends on big the oranges are and how many slices you get per orange.

        Reply
    3. hope

      July 05, 2021 at 11:11 pm

      5 stars
      I agree! They will last two years or maybe longer if they are stored properly. They are best kept in a cool dry place.

      Reply
    4. jordan

      June 28, 2021 at 12:21 am

      5 stars
      I agree! They will last two years or maybe longer if they are stored properly. They are best kept in a cool dry place. They will become pale in color and very brittle when it’s ready to make a new one!

      Reply

    Primary Sidebar

    HI! WE ARE GLAD YOU'RE HERE!

    Teri and Jenny of Spoon Fork Bacon

    We hope you find something you love in
    our little corner of the internet.
    XOXOXO, Teri + Jenny

    ABOUT US

    As Featured On

    A complication of logos showcasing where Spoon Fork Bacon has been featured. Including delish, today show, cosmopolitan, good morning america, domino, good housekeeping, william sonoma, and country living.

    Asian Inspired

    BBQ

    PORK

    DESSERT

    For Dinner Tonight

    • Panko crusted lamb chop recipe on a plate. Panko-Crusted Lamb Chops Recipe
    • Tteokbokki recipe on a platter. Tteokbokki (Korean Spicy Rice Cakes)
    • Cajun shrimp pasta recipe in a bowl with a fork on the side. Cajun Shrimp Pasta
    • Korean Army Stew or Budae Jjigae in a pot ready to be served. Budae Jjigae (Korean Army Stew)
    • Shrimp scampi recipe on a plate with bread and lemon wedges. Shrimp Scampi Recipe
    • A collage of our best Valentine's dinner ideas. Best Valentine’s Day Dinner Ideas

    Popular Now

    • Fried pickle chips on a platter with ranch dressing. Fried Pickle Chips
    • Carrot cake recipe on a cake stand with a slice out. Carrot Cake Recipe
    • Shrimp scampi recipe on a plate with bread and lemon wedges. Shrimp Scampi Recipe
    • Brown Butter Colcannon recipe in a bowl with a spoon in it. Brown Butter Colcannon
    • Chicken and gnocchi soup in a bowl with bread on the side. Chicken Gnocchi Soup
    • Cajun shrimp pasta recipe in a bowl with a fork on the side. Cajun Shrimp Pasta

    Footer

    As Featured On
    As featured on graphic.

    GET NEW RECIPES DELIVERED TO YOUR INBOX!

    Thank you!

    You have successfully joined our subscriber list.

    Footer

    • Facebook
    • Instagram
    • Pinterest
    • RSS Feed
    • Twitter
    • TikTok

    All content including images © 2011-2022 Teri Lyn Fisher & Jenny Park. Stealing is bad karma.

    Spoon Fork Bacon contains paid advertising banners and occasionally affiliate links, and sponsored posts.
    As an Amazon Associate I earn from qualifying purchases.

    Sponsored posts are indicated at the start of such posts. All of our opinions are always our own.
    Thank you for supporting our sponsors. It helps us pay to run this site and bring you unique and original recipes.

    Privacy Policy | Accessibility Statement